Updating Dash
What Will You Need?
AWS User With Administrator Permissions – (the CloudFormation template creates resources that require a higher permission set)
Latest Dash Compliance Platform CloudFormation Template
Existing Dash Compliance Platform in your AWS account
About 5 minutes of time
Updating to v2.9.4
The update is only available to those who meet the minimum requirements:
Subscription to Dash via AWS Marketplace SaaS Contracts
Software version above 2.8.1
Clients that meet requirements can proceed to the “Backing Up Existing Application Data” section.
**Please Note: Our team has updated the Dash monitoring connection and mechanism. After updating to v2.9.4 you will need to follow steps in the “Reconnect AWS Account Monitoring“ section to reconnect monitored AWS accounts. Dash monitoring will not work properly without following these steps.
Clients that do not meet the minimum requirements, please wait for further instructions.
Updating to v2.9.0
Dash v2.9.0 introduces a new SaaS Contract pricing. This pricing is a lot simpler and provides more transparent billing to Dash customers. In order to update to v2.9.0, clients should follow the steps below:
Create a Backup of existing application - To ensure that all Dash application data is available, it is important that your team creates a Dash backup. This backup will save all configuration in case of a stack or application issue.
Follow the instructions in the “Backing Up Existing Application Data” section below to create a backup and confirm it’s availability.
Confirm that the backup is visible in the settings and then proceed to Step #2.
Subscribe to the New Dash Listing - Navigate to to the new Dash ComplyOps listing on AWS Marketplace.
Login to your AWS account
Select your Dash pricing plan > Subscribe to new Dash listing
You may be directed to a form page to “Add Organization” (with fields for Organization Name, Organization Contact Email, etc)
You can skip this page, since your team has an existing organization/license
Update CloudFormation Stack - Update your Dash application CloudFormation stack to v2.9.0.
Download the latest 2.9.0 CloudFormation template here.
Follow the Dash update instructions listed below to update your stack using the 2.9.0 CloudFormation template.
Login to Dash and confirm that you are able to access the Dash application
Unsubscribe from Old Dash Listing - Once you have confirmed that the new application is operational, unsubscribe from the old Dash application listing.
Login to AWS
In the top search bar navigate to “AWS Marketplace Subscriptions”
Navigate to "Dash ComplyOps" (SaaS listing, not SaaS Contract) > Click the "Manage" button
Click "Actions" > "Cancel Subscription" > Confirm Unsubscribe
Backing Up Existing Application Data
Before updating the Dash application to a new version, your team should backup your existing application data.
Organizations with versions Dash applications below v2.4.0, should contact Dash for update instructions
For Dash v2.4.0 and above, your team can take the following steps to backup existing application data:
Login to your Dash application and navigate to the Settings Page.
Click on “Backup and Restore” in the Settings menu options.
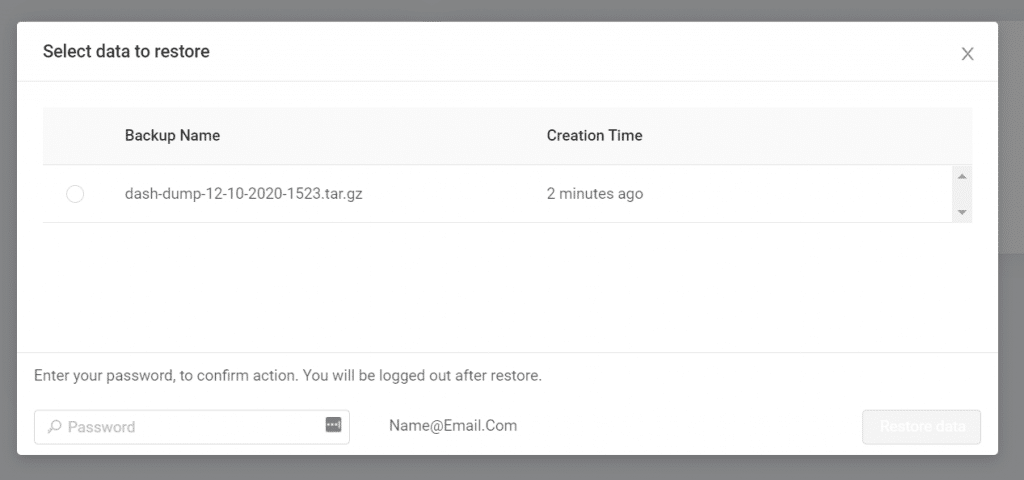
Click the “Create Backup” button. A loading screen will appear for 10 seconds or longer.

4. Confirm that your backup has been created by clicking on the “Restore Backup” button. You should be able to see a backup listed with the most recent creation time in the popup modal.
5. Once your team has confirmed that your a backup has been successfully created for your Dash application data, your team can move on to next steps for updating the application.
Update Instructions
Logout of any existing Dash ComplyOps application.
Download the latest CF (CloudFormation) template.
Log into AWS account and pick your region with existing Dash Compliance Platform installation
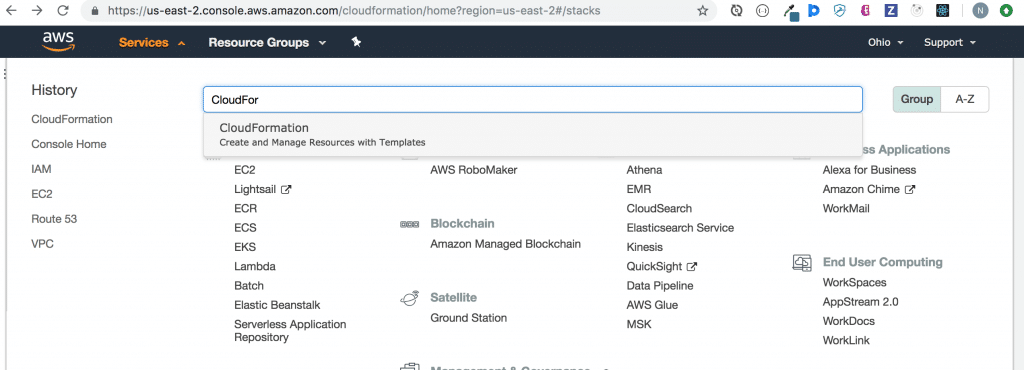
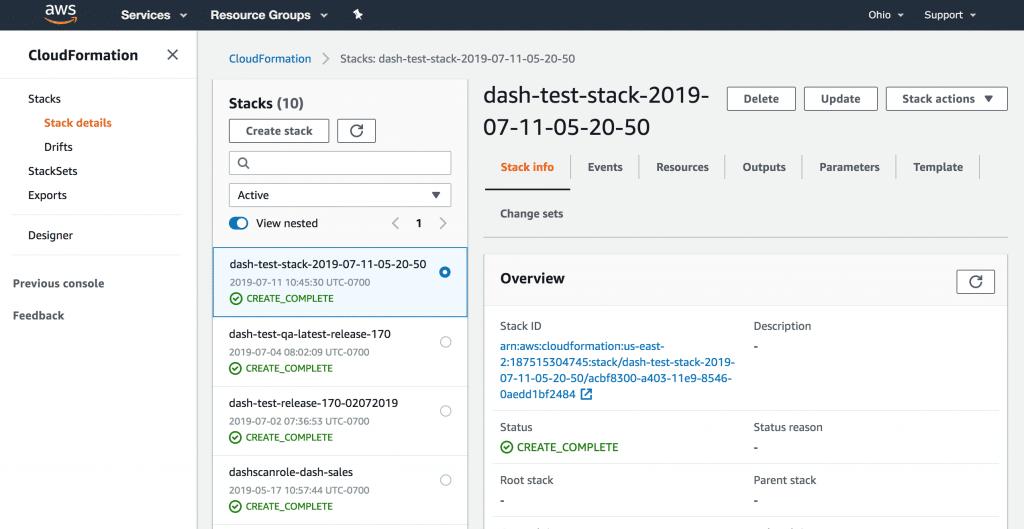
Go to CloudFormation and choose existing Dash ComplyOps installation.
5. Select Stack and press button Action → Update Stack
6. Select the radio button Replace Current Template. Use the latest CF Template.
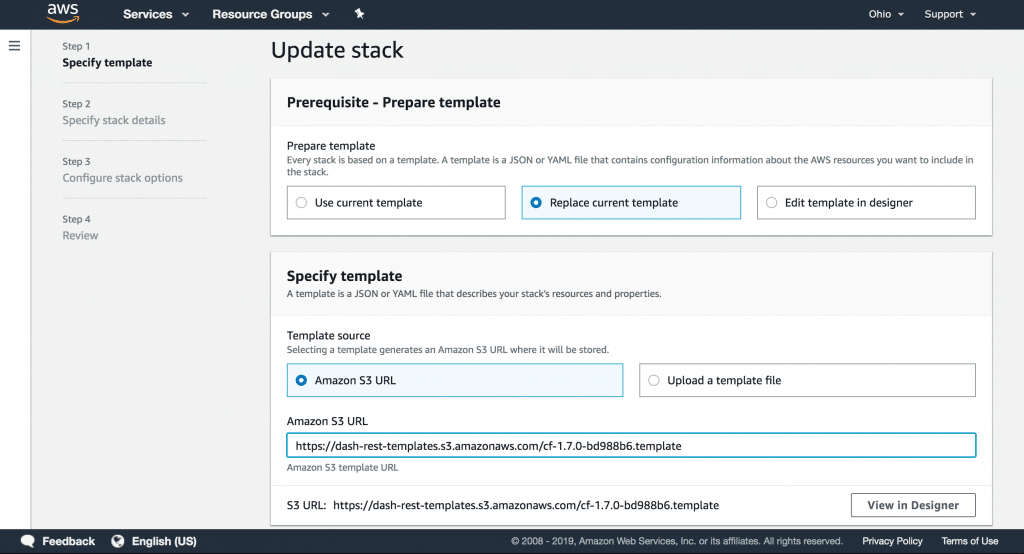
7. Click “Next”.
8. Go to next page, and click “Next“. No changes are required.
9. Go to next page, and click “Next“. No changes are required.
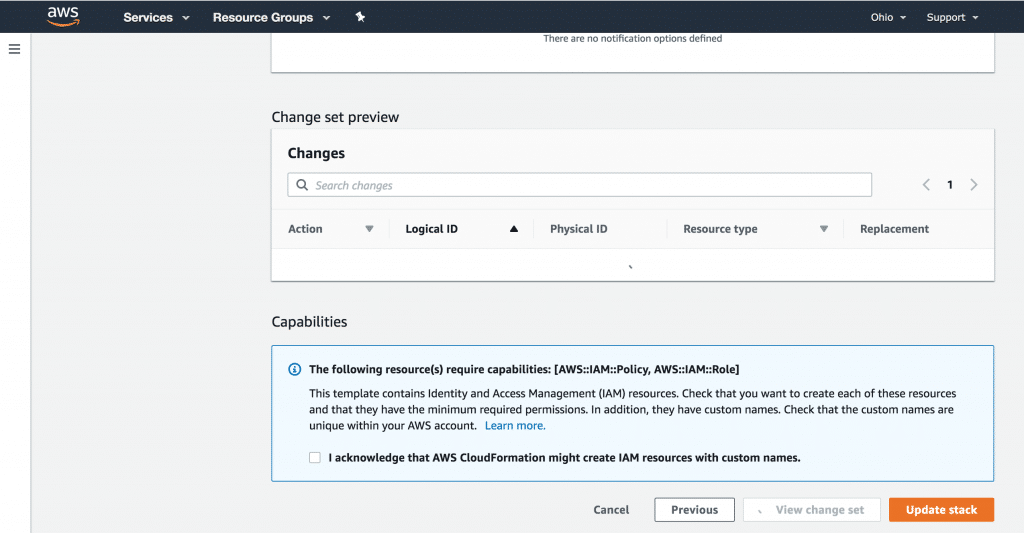
10. On this page check the checkbox “I acknowledge that AWS CloudFormation” might create IAM resources with custom names. and click “Update“.
11. The update will take a few minutes. After that, you should see that the update completed successfully. The CloudFormation Stack will have the status “Update Complete”.
After updating Dash ComplyOps, you may need to take the following steps to see changes to your version of the Dash application:
Logout of the Dash application (If you are still currently logged in).
Refresh the Dash webpage in your browser.
Consider clearing application data/cache in the browser by taking the following steps:
Go to the Dash URL
In Chrome - Right click and select the option “Inspect”
Go to the “Application” tab
Click “Clear site data”
Close the inspect window and refresh the page
Reconnect AWS Account Monitoring
Dash v2.9.4 introduces new configuration for connecting AWS accounts and managing multiple accounts with Dash monitoring. Clients must create monitoring roles via the steps below to continue properly monitoring AWS accounts.
Complete the following steps to confirm monitoring connection for AWS accounts:
1. Login to Dash ComplyOps > Navigate to the Settings page on the left sidebar
2. Navigate to the “Monitoring Settings”
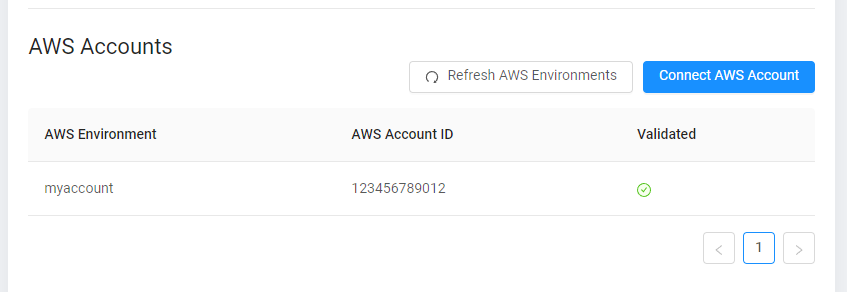
3. Under the “AWS Accounts” section, click the “Refresh AWS Environments” to see the current connected accounts for monitoring.
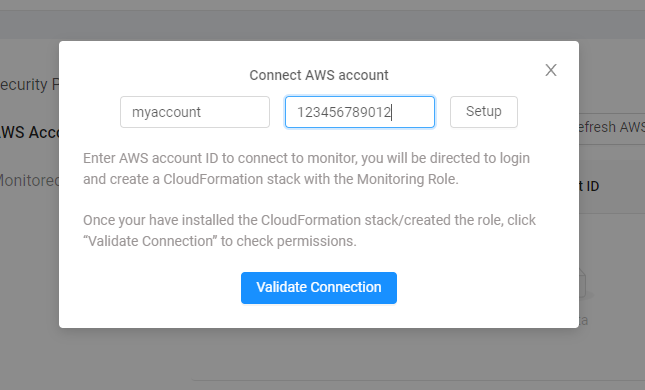
4. Click the ‘Connect AWS Account’ button under AWS Accounts section. You will need to enter the following:
AWS Account Name - A name defined by your team to identify the account you are connecting to monitoring
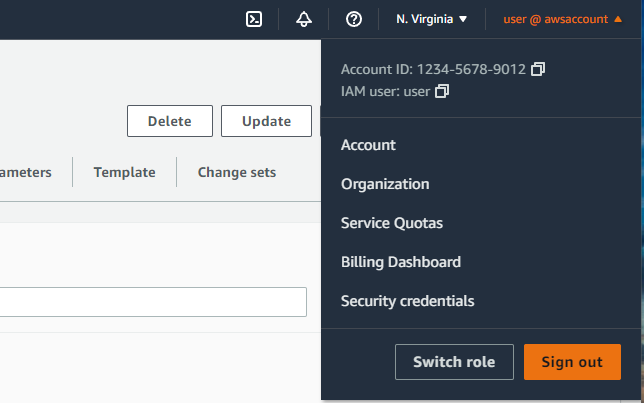
AWS Account ID - Enter the AWS Account ID for the AWS account you want to connect to Dash monitoring.
You can find the AWS Account ID for your account by logging into the account and clicking on the top right user dropdown.
5. Once you have entered the AWS Account Name and AWS Account ID, click “Setup” button
You will be taken to AWS where you will need to login and grant Dash permission to scan this environment.
6. In the new browser tab that just opened, please enter the AWS user and password for the selected AWS account.
After logging it, you will be redirected to the CloudFormation setup page. It has already preloaded with the correct CloudFormation template, using an S3 URL

Click the “Next” button
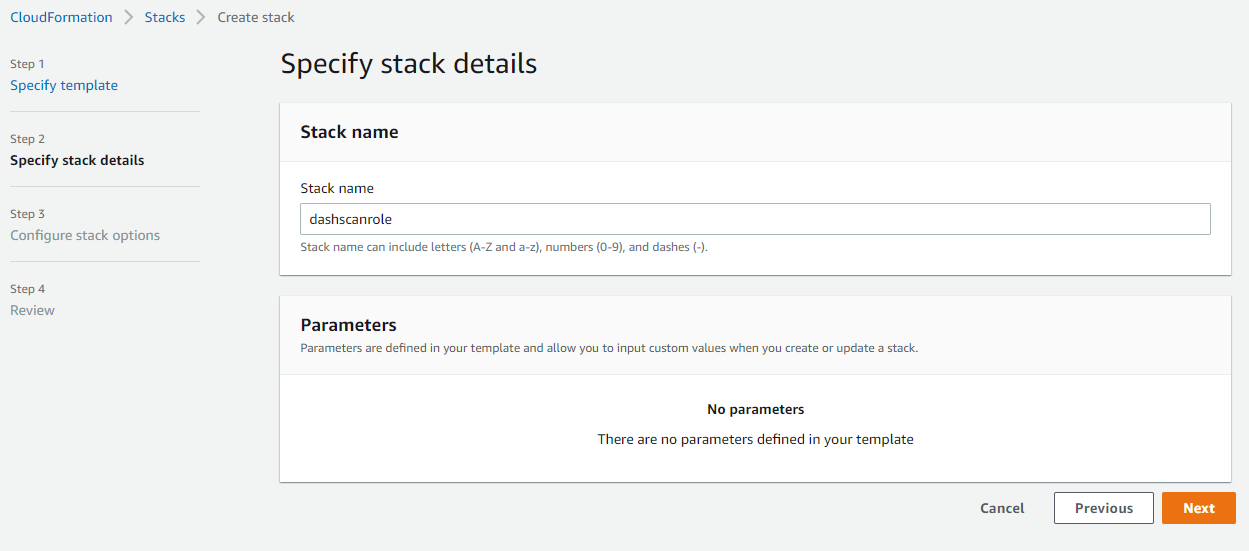
8. On the subsequent page, click the ‘Next’ button again. There is nothing to change on this screen.
Scroll to the bottom. Check the acknowledge checkbox and click the “Create stack” button.
It may take a few minutes to create this IAM role and then CloudFormation will show CREATE_COMPLETE for the IAM role
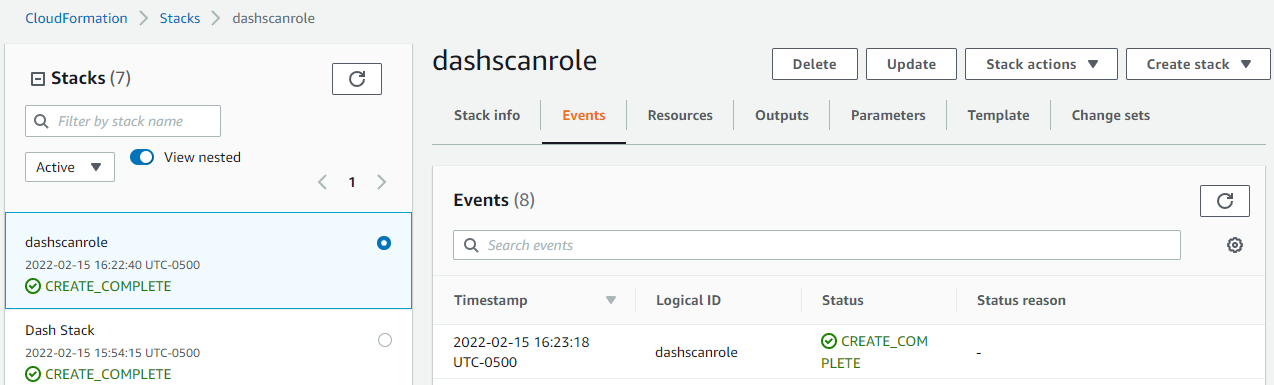
9. Head back to the Dash application and click “Validate connection”.
The Dash application should connect the new permission and show the AWS account as connected to monitoring (like the image shown below). You can click the “Refresh AWS Environments” button to see the current state of monitored accounts.
You can connect multiple AWS accounts to Dash by following the same process mentioned in the steps above.