
Sending Findings To JIRA
Sending Dash Compliance Events To Jira
Dash allows teams to extend compliance by connecting Dash compliance events into Jira and other task management solutions. Dash customers can send compliance events into Jira and manage Dash compliance tasks alongside their ordinary security and DevOps workflows.
Jira Requirements
In order to send compliance issues to Jira, your team must have a board already created inside of your instance of Jira. Your organization may want to use a separate Jira board to test this connection and manage Dash compliance issues**
As of v4.1.0, the following requirements and support configurations for Jira boards may be utilized.
Jira Account: Currently Dash only supports connection to Jira accounts that have the language set to English.
Supported Board Types: The following types of Jira boards can be connected and receive compliance issues from Dash. Your team must use one of the following board types to receive Dash compliance issues.
Kanban team managed board
Kanban company managed board
Scrum team managed board
Scrum company managed board
Required Board Issue Types: Dash compliance issues are sent as cards with a specific issue type. The Jira board you connect to Dash, must have the following Issue Types. Ensure the the board you connect to Dash supports the following Issue Types.
Story
Task
Subtask
API Token: In order to connect Dash to your Jira application, you will need to create an API token (key) associated with a specific Jira user. This token creation is described in Step #3 and #4 below.
It is important to note that this token should be created and associated with a user with the following requirements.
The API Token must be created from a user with access to the Jira board (you will connect to Dash).
The User must have the ability to create tickets in the Jira board that will be connected.
Jira Setup Instructions
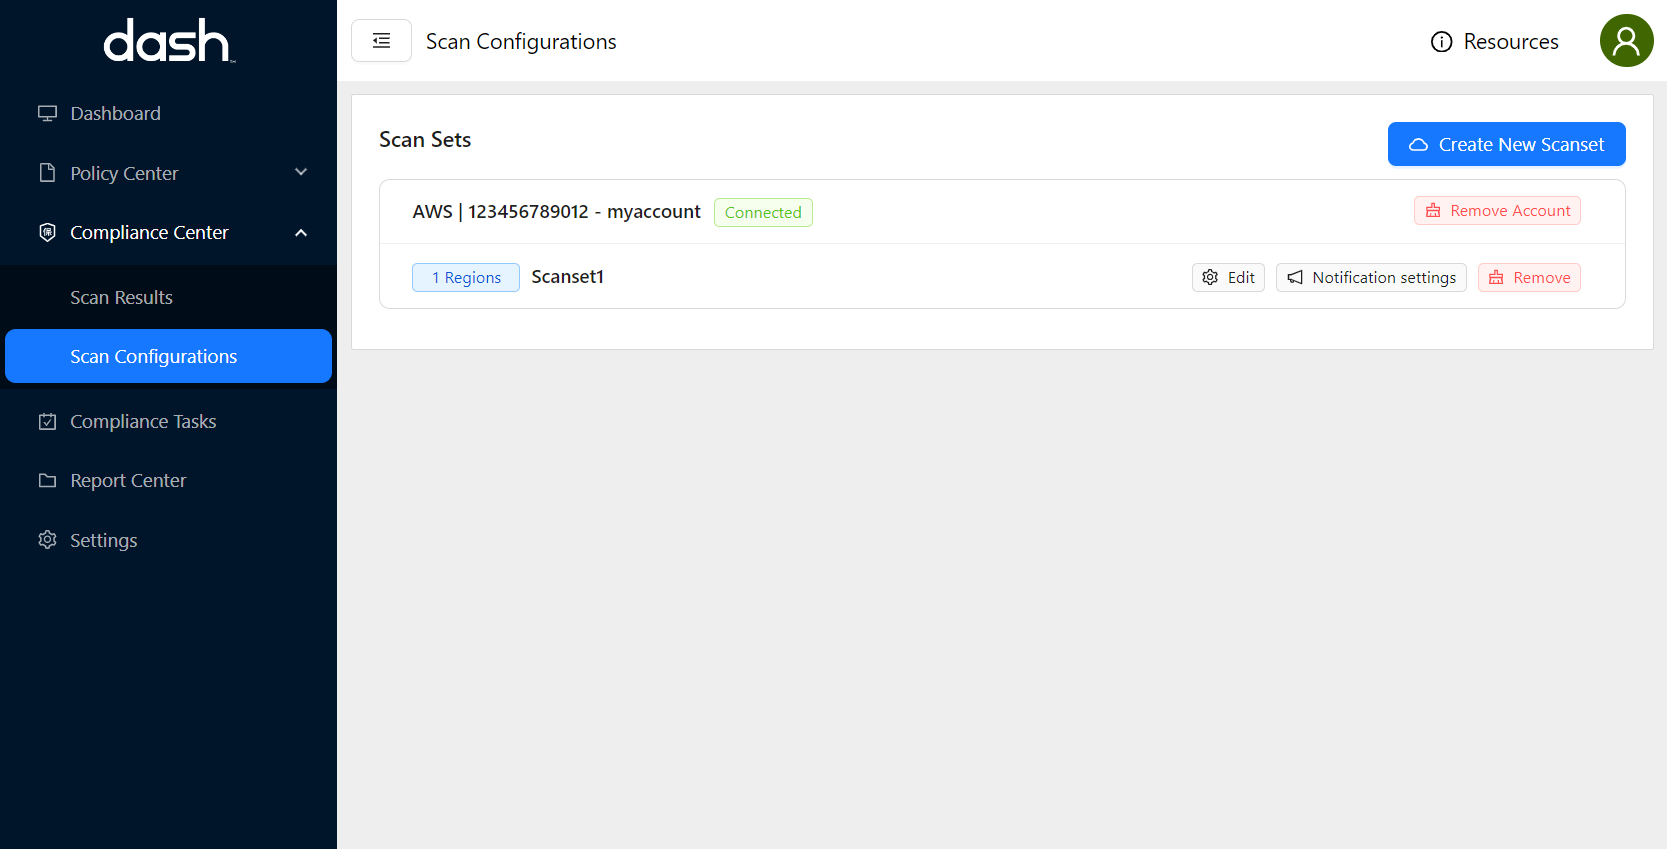
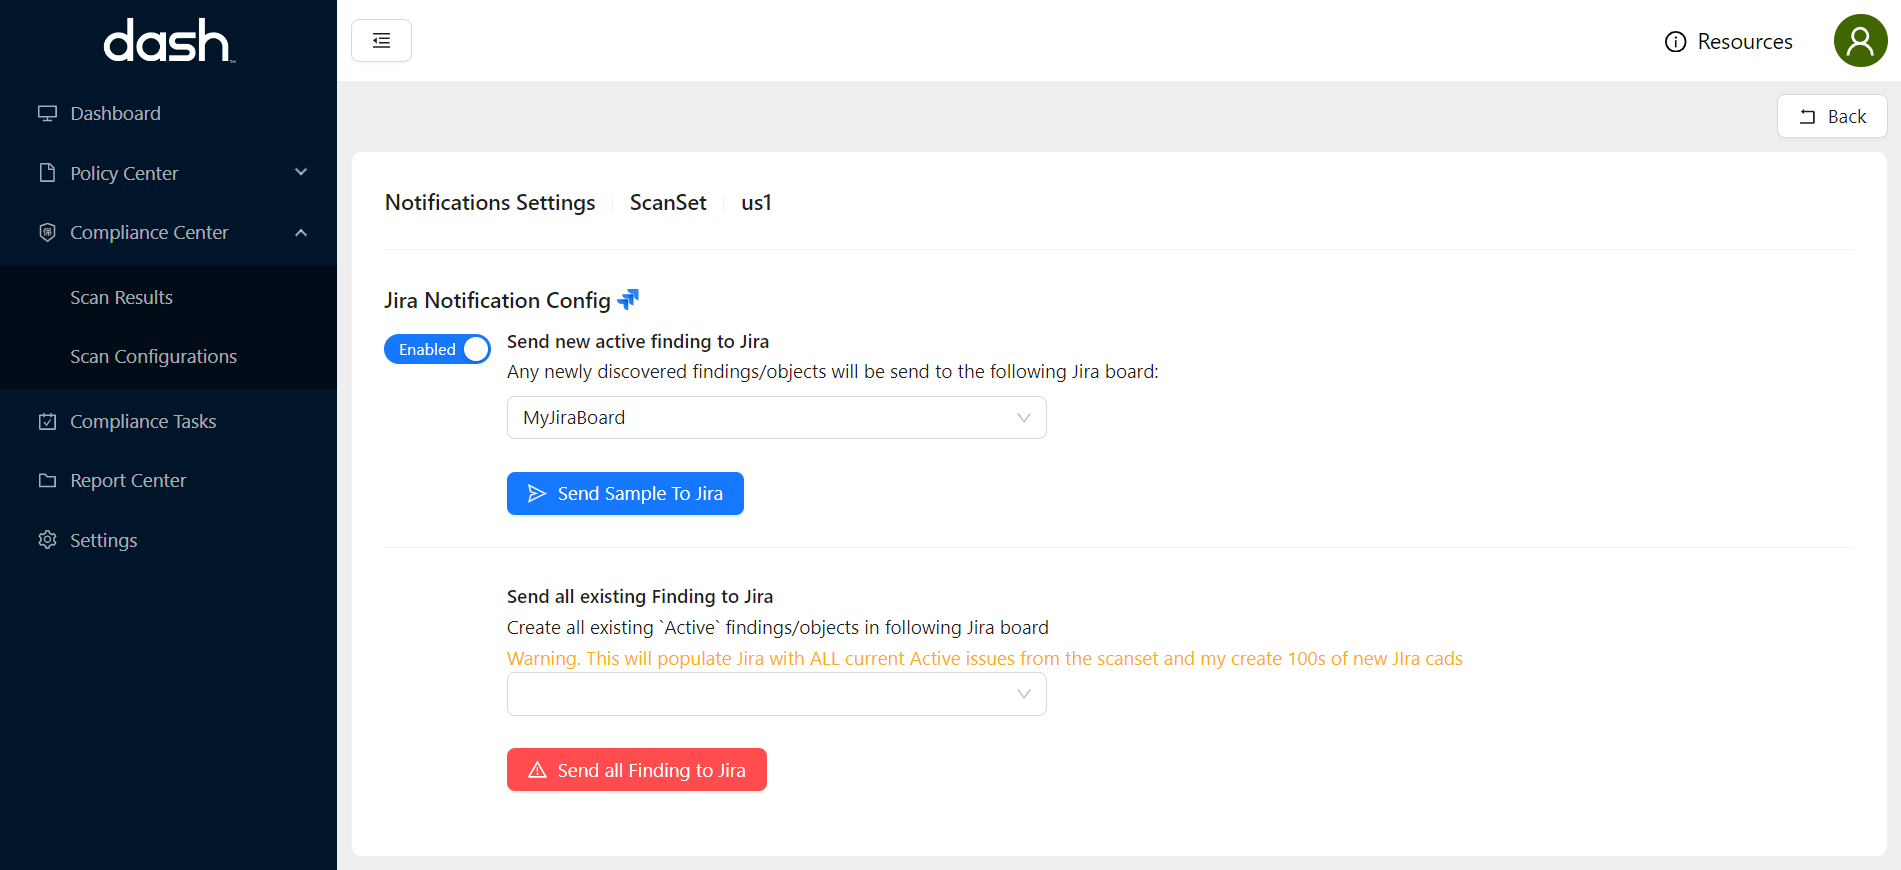
In Dash ComplyOps, navigate to the Compliance Center > Scan Configurations. The page should look like this:
Before continuing, ensure that you have a Jira board configured that you would like to send Dash issues to. You may consider the following when connecting Dash to Jira:
Dash will automatically send Compliance Center findings to the Backlog or Active Sprint initial state depending on the Jira board you define.
Dash findings can be sent to both Scrum and Kanban based Jira boards defined in the above “Jira Requirements” Section.
Dash will send compliance issues from the Dash Compliance Center to the assigned Jira board when they are created.
For the Scanset you want to send to Jira click the “Notification Settings” button
You can can enable Jira card creation for one or more Scansets you are monitoring in the Dash Compliance Center.
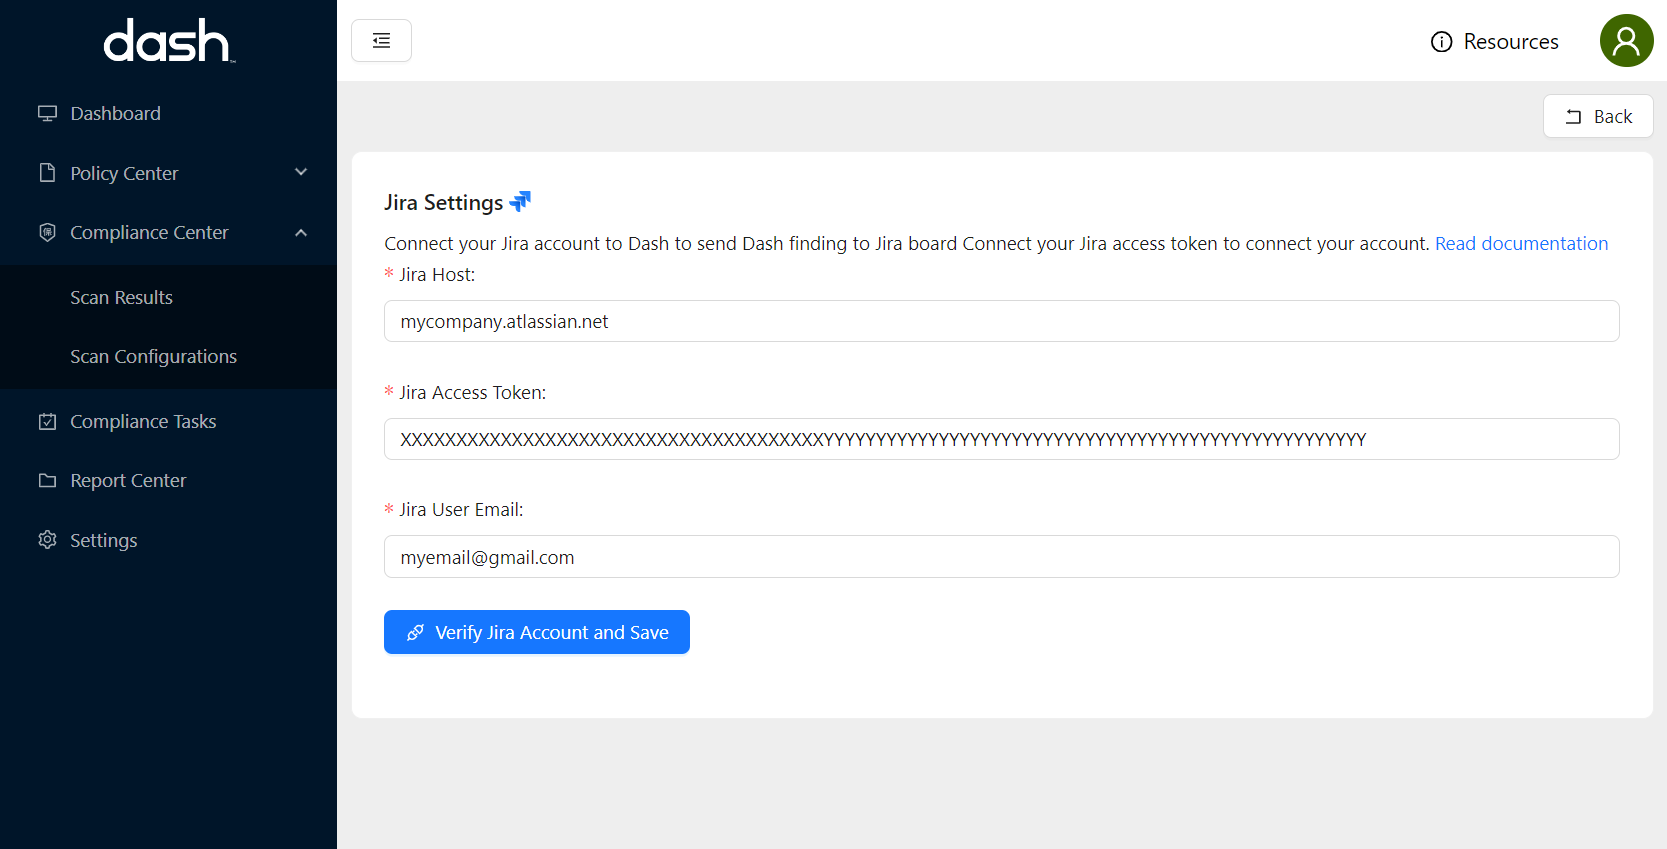
You will then be prompted to enter in the following (If you have already connected your Jira account you can proceed to Step #10):
Jira Host – This is the URL or address of your Jira application, for example mycompany.atlassian.net.
Jira User Email – This is the email Dash will use to authenticate the connection with Jira. Ensure that this user email has access Jira administrator permissions and access to the Jira board(s) you will be connecting Dash with.
Jira API Key – This is the API Key associated with the Jira account and authentication. You can click the “Create API Key” button to generate an API Key for this field.
To create a Jira API Key, click the “Create API Token” link.
You will see a screen similar to this:
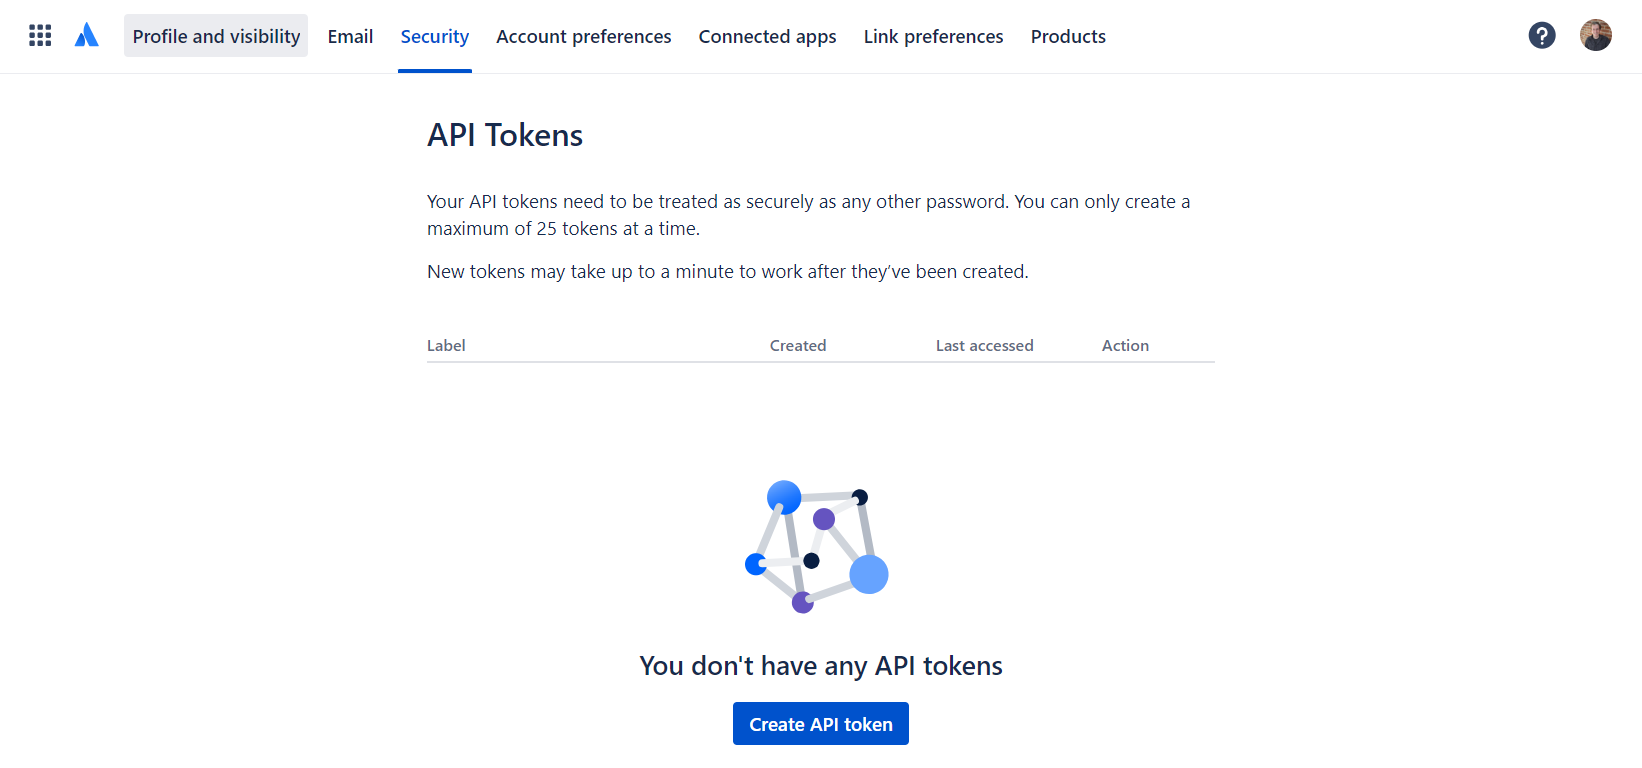
Click the Create API token button.
Enter in a Label name and click the Create button.
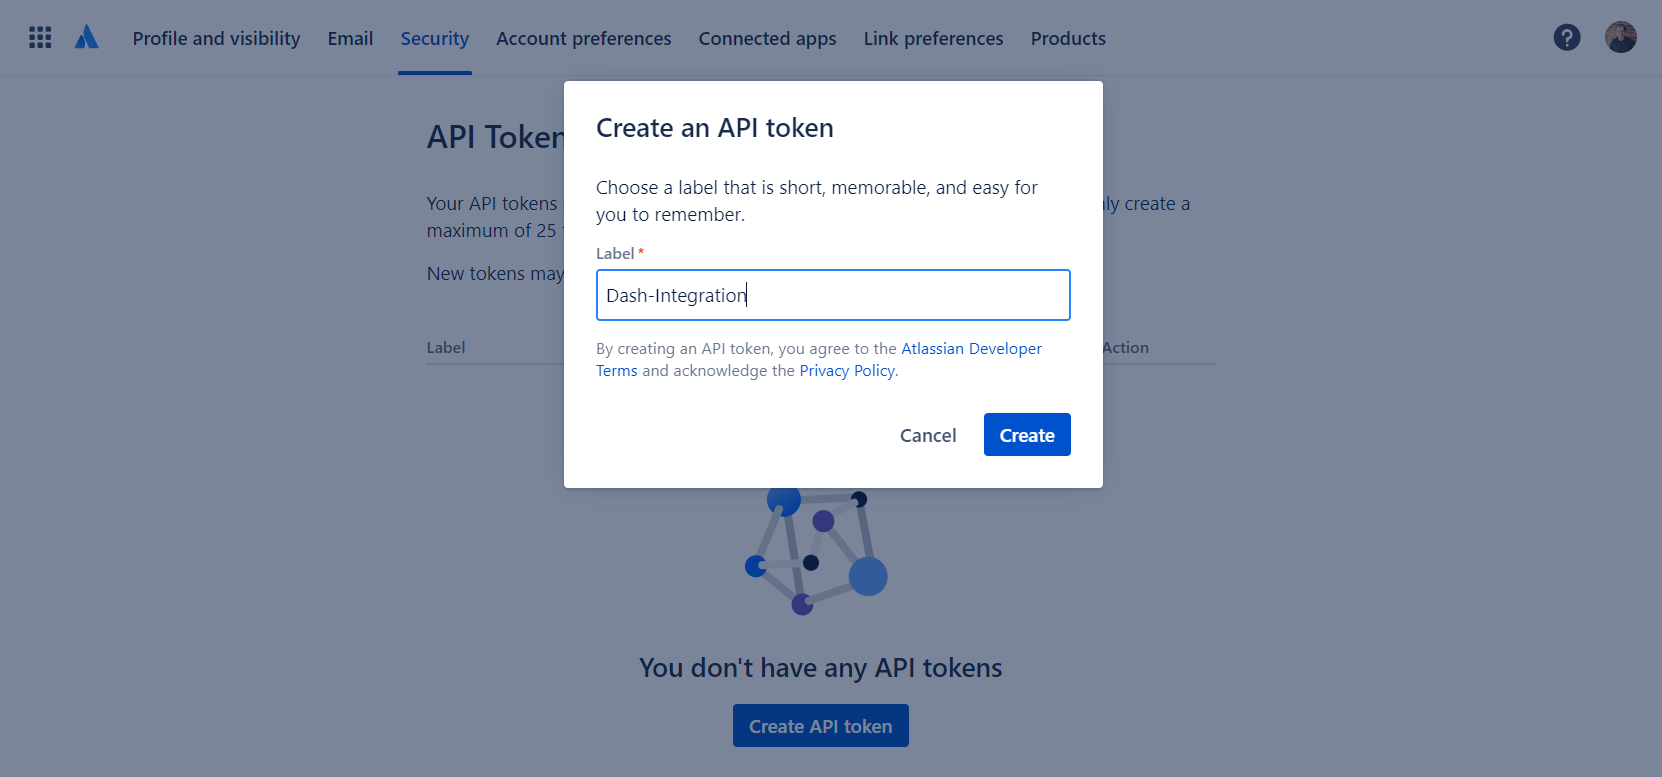
Copy your API token by clicking the Copy button.
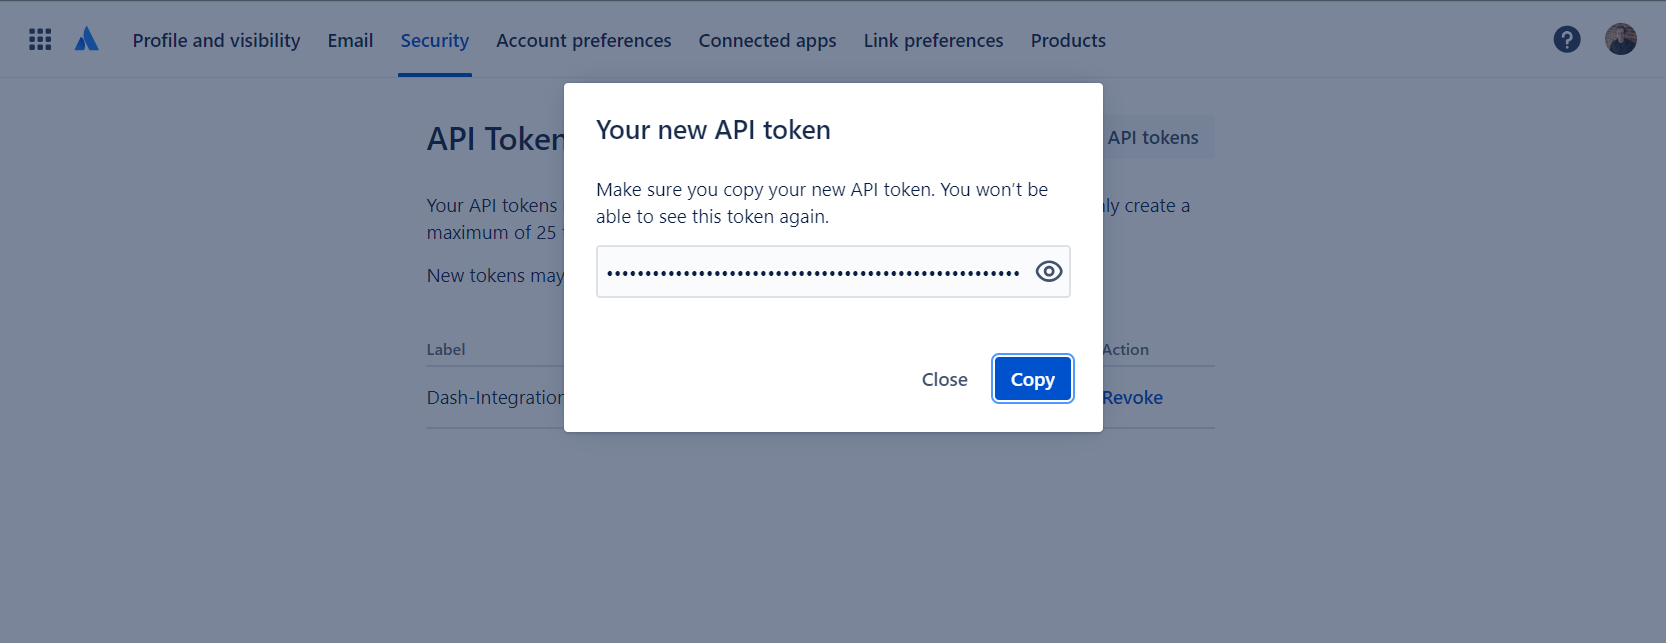
Paste the API token into the Jira API Token field in Dash. Complete all fields, and then click Validate Connection.
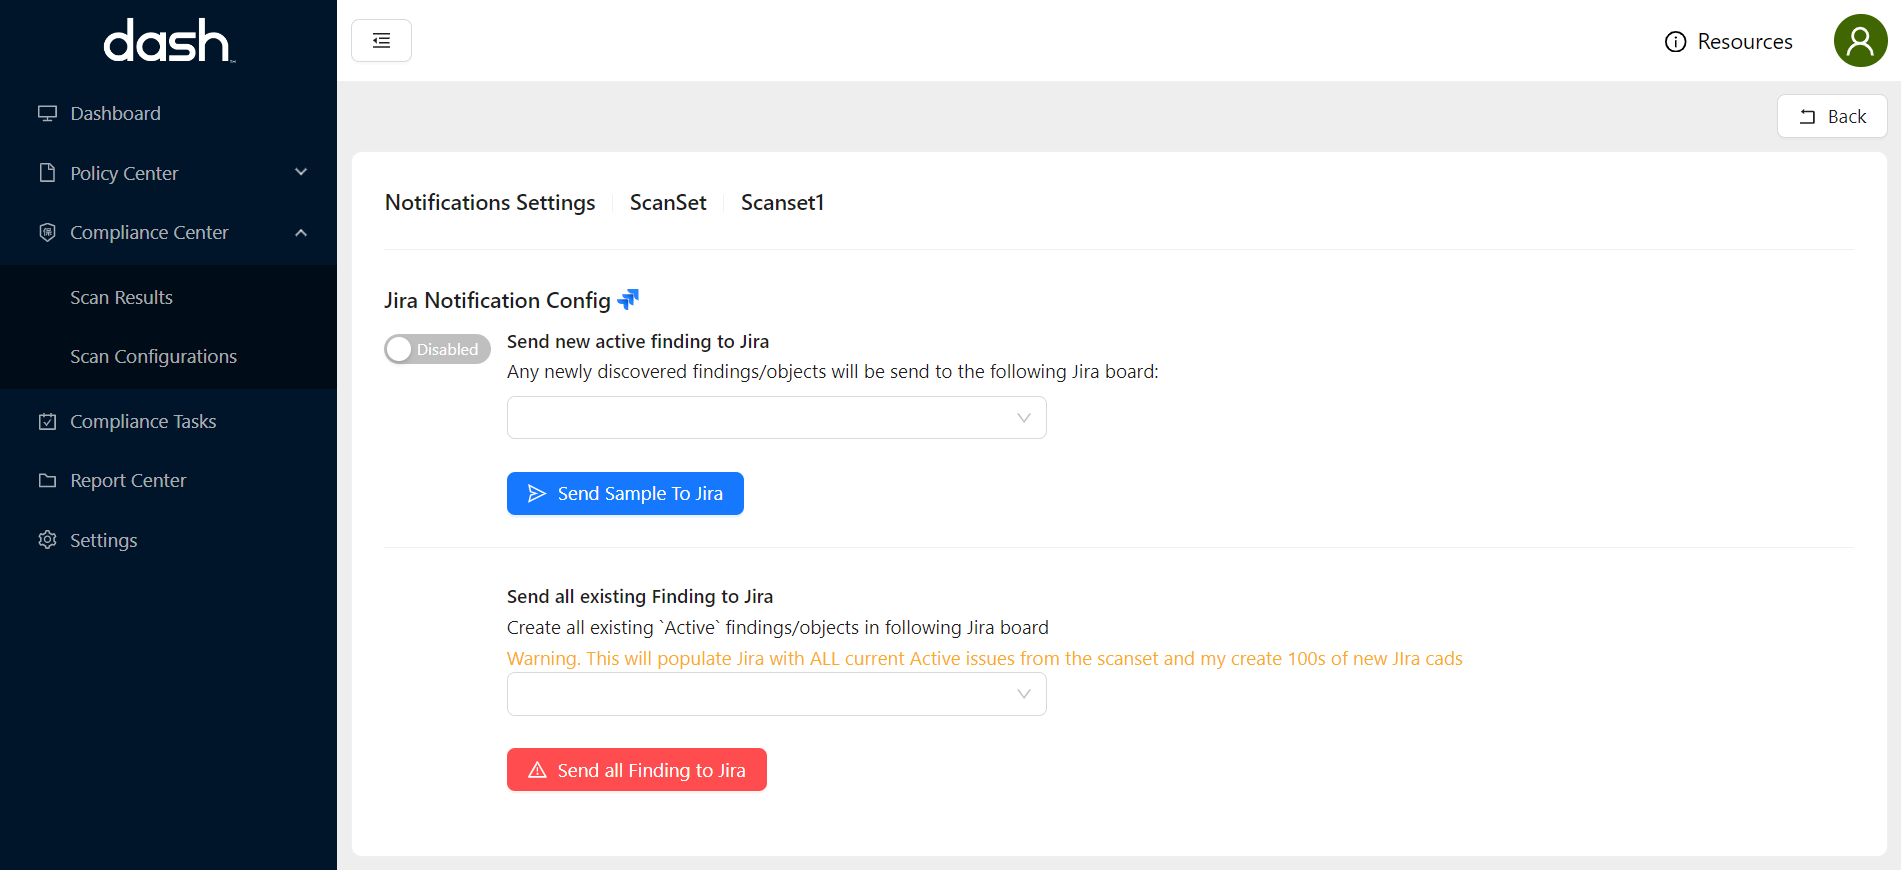
You will now see options to Jira options to “Send new active findings to Jira” and “Send all existing findings to Jira”.
Jira Configuration Options
After connecting your instance of Jira, you will be presented with the following options “Send new active findings to Jira” and “Send all existing findings to Jira”.
If you create a new Jira board, you may need to refresh the webpage to see the new board in the options.
The following options are available when configuring Jira with Dash ComplyOps:
Send new active finding to Jira – Enable/disable sending of newly created/rediscovered Compliance Center findings for the Scanset to Jira.
From the dropdown, select the Jira board where you would like to send findings for the current Scanset.
Switch the configuration setting to “Enabled” to enable sending of Dash findings.
Findings will start appearing in the Jira board after 2 daily scans. (You can test your Jira connection by sending a sample issue)
Just as a reminder: Compliance Issues will send compliance issues from the Dash Compliance Center to the assigned Jira board when:
A new Dash Compliance Center issue is discovered/created
A resolved Dash Compliance Center issue that is rediscovered/re-opened by Dash
Send Sample Issue – Test the Jira connection by clicking this button. A single Jira card should be created in the selected Jira board.
Send all existing findings to Jira – For teams that have many previous compliance center findings they would like to send to Jira. This button can be used to send All current findings in the Scanset over to the Jira board.
Viewing Dash Compliance Issues In Jira
After connecting your Jira service and enabling creation of Dash Compliance Issues, future issues will be created as cards on the defined Jira boards. (You may not see issues until scans find new compliance issues)
To view Dash Issues in Jira – Login to Jira – Navigate to the defined Jira Board
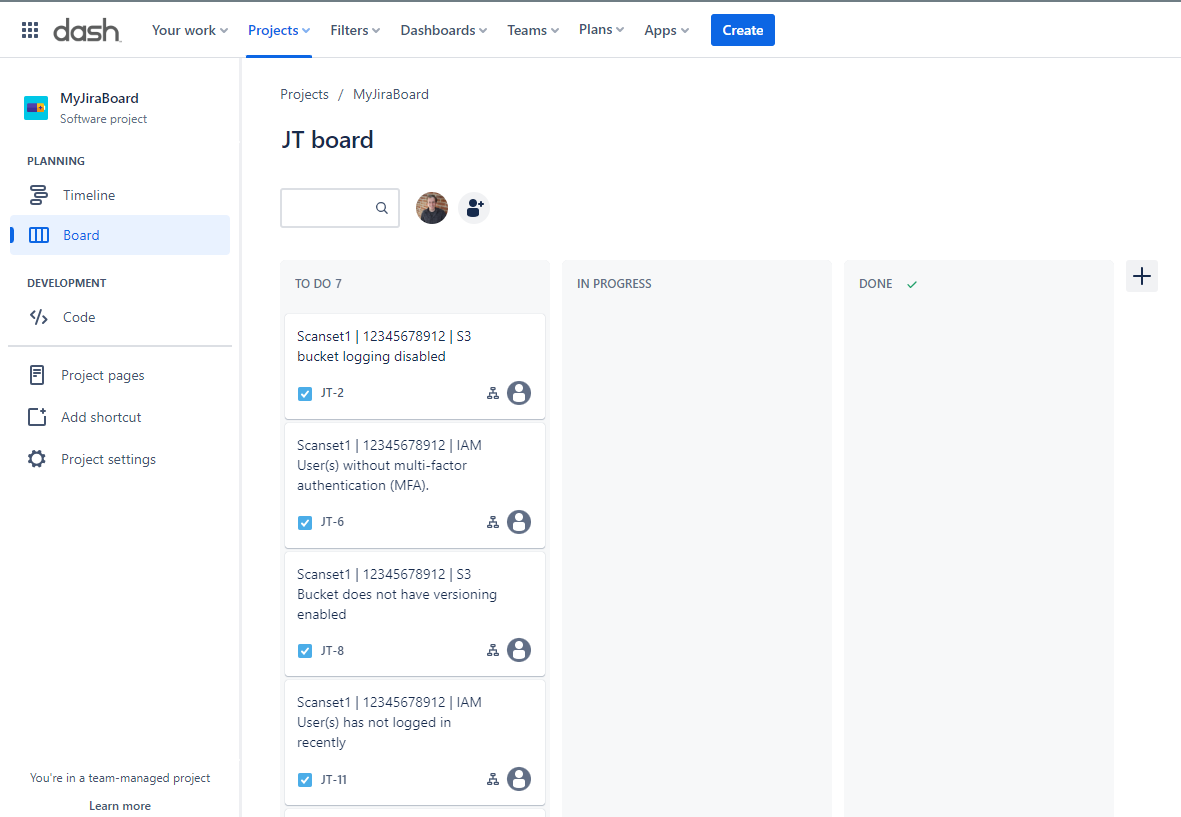
Dash will create a Jira Issue (Card) in the board Backlog for each Dash compliance issue as it occurs. You can view these issues in Scrum and Kanban Jira boards.
For Compliance Issues
Compliance Issues from Dash, such as issues around networking, encryption, and backup issues show up as issues in your Jira Backlog. We can see this our Backlog section of our Kanban board or on the Backlog Page of our Scrum Board.
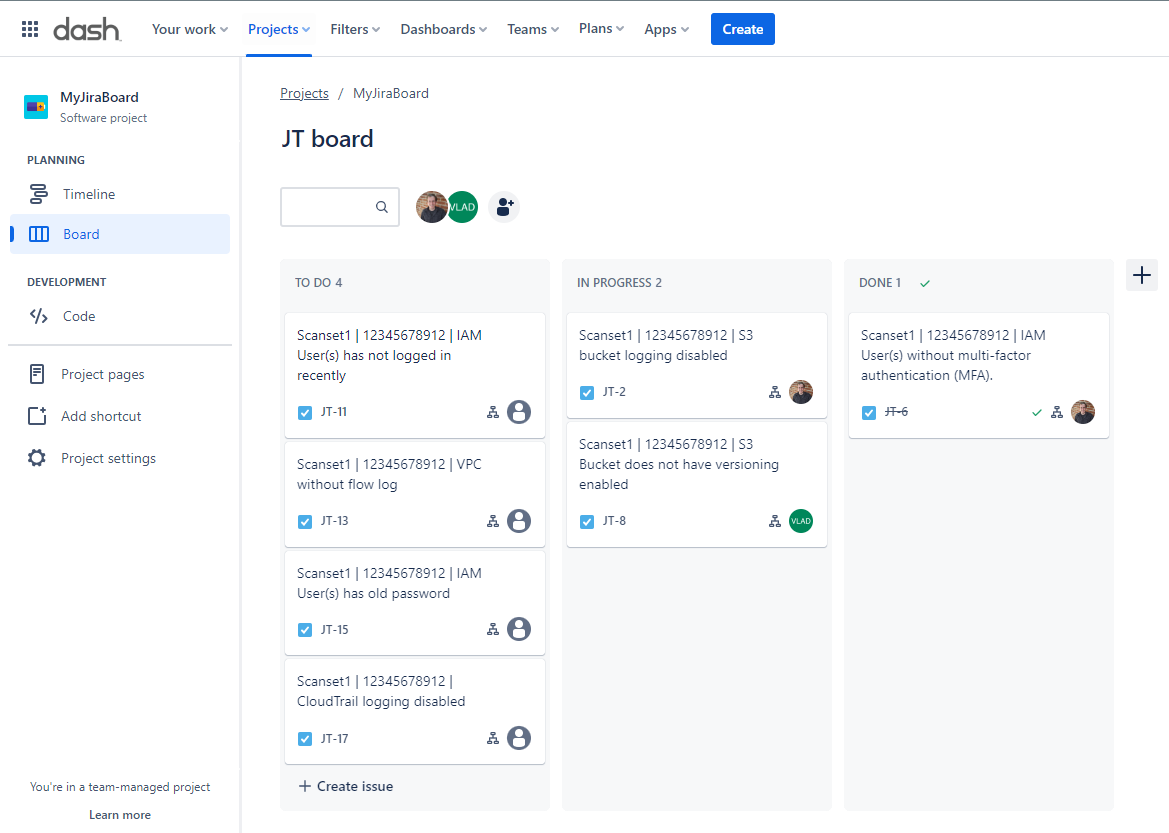
You can click on individual Compliance Issue to view additional context and navigate to issues in Dash ComplyOps. Each Compliance issue will have nested subtasks for each issue object affected by the issue.
In this way your team can track and manage issues with multiple affected resources/objects.
Your team can manage Compliance Issues in your Jira workflow, similar to any other issues. When future Compliance issues are created in the Dash Compliance Center, they will be added to the Backlog for the defined Jira board.
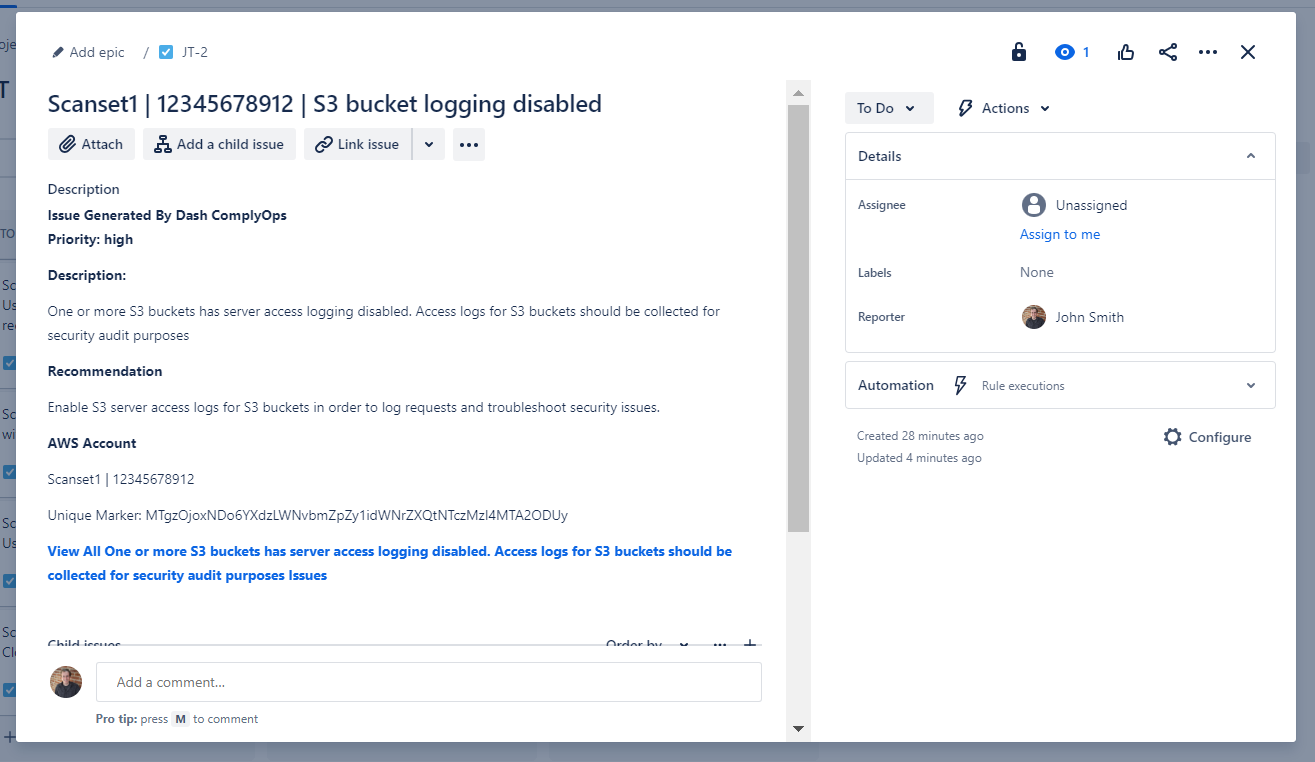
Jira Cards are created with the following structure:
Title - Jira card titles are structured as the following format Scanset Name | AWS Account ID | Finding Title
Description - Includes the following context.
Priority - The Dash ComplyOps Priority for the finding
Description - Description of the Dash finding
Recommendation - Recommendation for remediating the finding
AWS Account - The Dash Scanset name and AWS Account ID for the finding
Unique Marker - The Dash unique ID for the finding (Do not change this as it is used for tracking of Jira notification status)
Link - Link to the Dash Compliance Center Issue
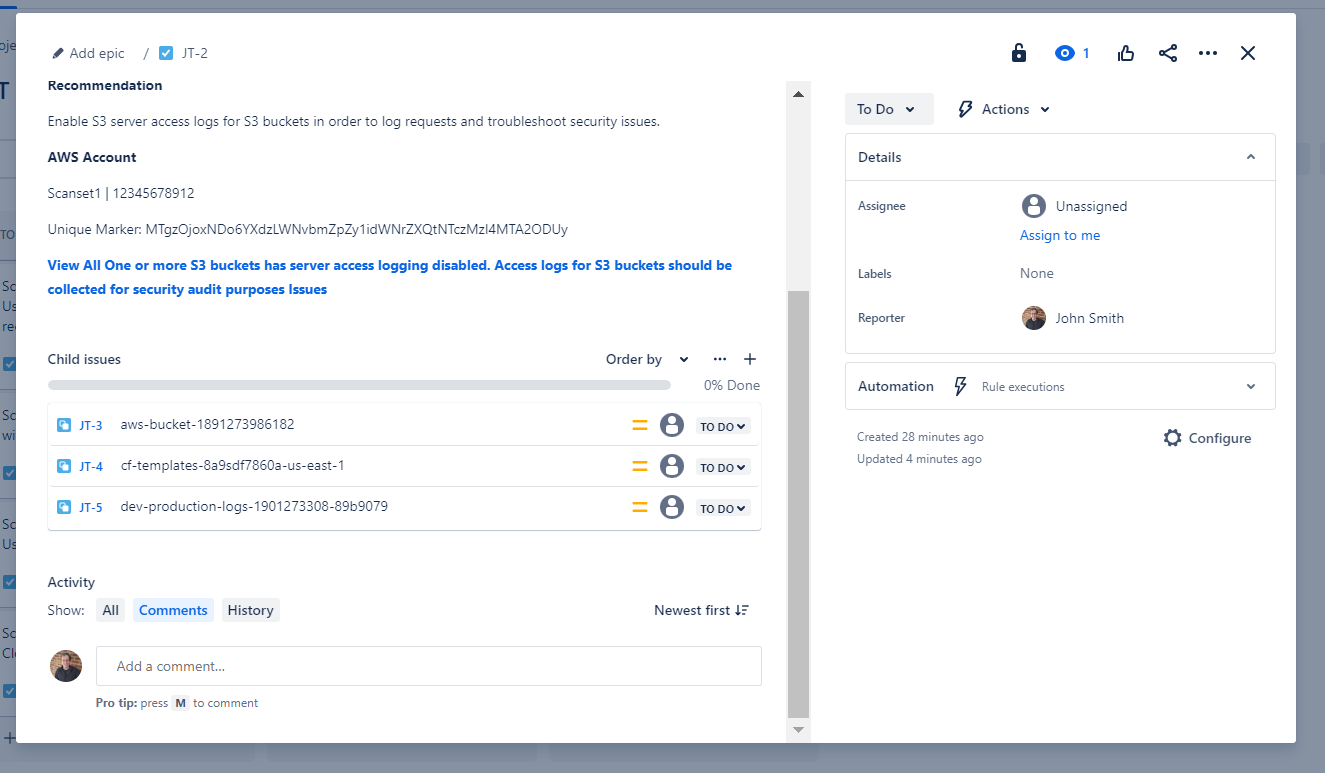
Child Issues - All related objects/resources affected by this finding. These objects are shown as sub-tasks that may be assigned and managed accordingly in Jira.
Disabling Jira Notifications For A Scanset
If you want to disable Jira notifications for one or more Compliance Center Scansets you can simply follow these steps:
In Dash ComplyOps Navigate to Compliance Center > Scan Configurations
Click the “Notification Settings” button for the applicable Scanset
Switch the Jira notification setting for the Scanset from “Enabled” to “Disabled” status
Dash will stop sending findings for this Scanset to the Jira board.
Removing The Jira Account Connection
Note: Disconnecting the Jira account will stop/terminate any existing Jira notifications/settings you have enabled for Scansets in the Dash Compliance Center. If you only want to disable specific Jira findings from being sent to Jira, we recommend following the steps in “Disabling Jira Notifications For A Scanset” section instead.
In Dash ComplyOps Navigate to Settings > Notification Settings
Click the “Disconnect Jira channel/account” button
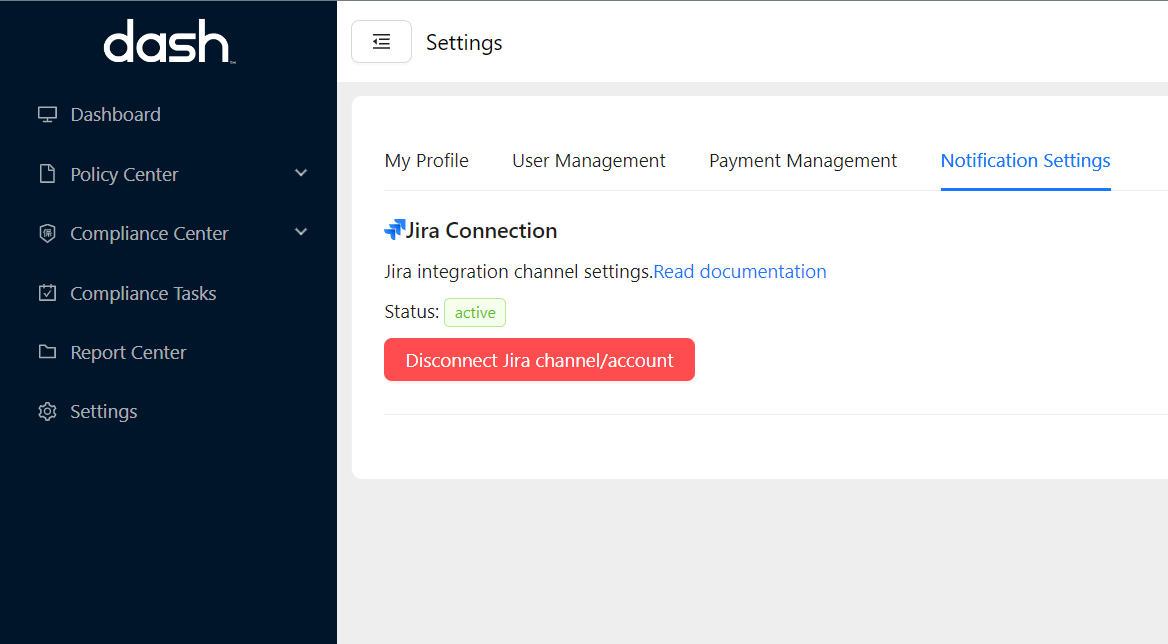
Confirm that you want to remove the Jira account by clicking the “Yes” button.
The Jira account should now be disconnected.