Risk Assessment
What is a Risk Register?
The Risk Assessment in RiskOps provides organizations with a standard methodology for performing a risk assessment. This process provides a structured approach to identifying, analyzing, and prioritizing risks within their IT systems, data, and operations. This digital assessment process replaces disjointed methods and manual analysis with an efficient, automated system designed to evaluate risks comprehensively and consistently.
Performing a thorough Risk Assessment is critical for building a proactive risk management strategy. This process helps organizations uncover vulnerabilities, assess potential impacts, and determine the likelihood of threats materializing. RiskOps simplifies this process, ensuring that assessments are not only accurate but also actionable.
Risk Assessment Requirements
Before your team can perform a Risk Assessment in RiskOps, you must have the following:
You must have one or more active assets has to be present in your RiskOps Asset Inventory.
You must have one or more active risks in your RiskOps Risk Register.
Risk Assessments Recommendations:
You can run a risk assessment at anytime. Consider running a new assessment when significant changes occur within the organization, structure, or IT environment.
You may consider adding a “Control Detail” and “Risk Mitigation” to all risks you plan to evaluate in the risk assessment, since these values will be required during the assessment process.
You should consider adding all applicable assets and risks to an assessment scope (All assets and risks for the project, environment, or organization, etc) rather than cherry-picking the highest/lowest assets/risks, as this will lead to a more valuable assessment report.
You may consider inviting other users/team members to participate in parts of this risk assessment.
How To Perform A Risk Assessment
Login to RiskOps
Navigate to “Risk Assessment” on the left sidebar
Click the “Start New Risk Assessment” button in the top right of the page.
Note - You can only perform a single risk assessment at a time. If you have previously started a risk assessment and have not yet completed it, click the “Continue Risk Assessment” process.
The RiskOps application will save the your steps in the risk assessment as you complete them.
Step 1 - Select Assets
After starting a risk assessment you will be prompted to select Assets in scope for the assessment.
Note - You must have one or more Active Assets in your Asset Inventory to conduct a risk assessment.
Select assets applicable to the current risk assessment
You can page through assets and/or use the search bar to find specific assets to include in an assessment.
You can select individual assets by using the checkmarks next to each asset on the left side.
You can select all assets for a specific page by clicking the “Select All on Page” button on the top left
Review all selected Assets selected and confirm that the data is accurate.
You may edit assets as need on this page of the assessment by clicking the “Edit” button next to the Asset.
Once the applicable assets have been selected click the “Select Risks” button in the top right to move to the next step.
You must have at least one asset selected to move to the next page.
Step 2 - Select Risks
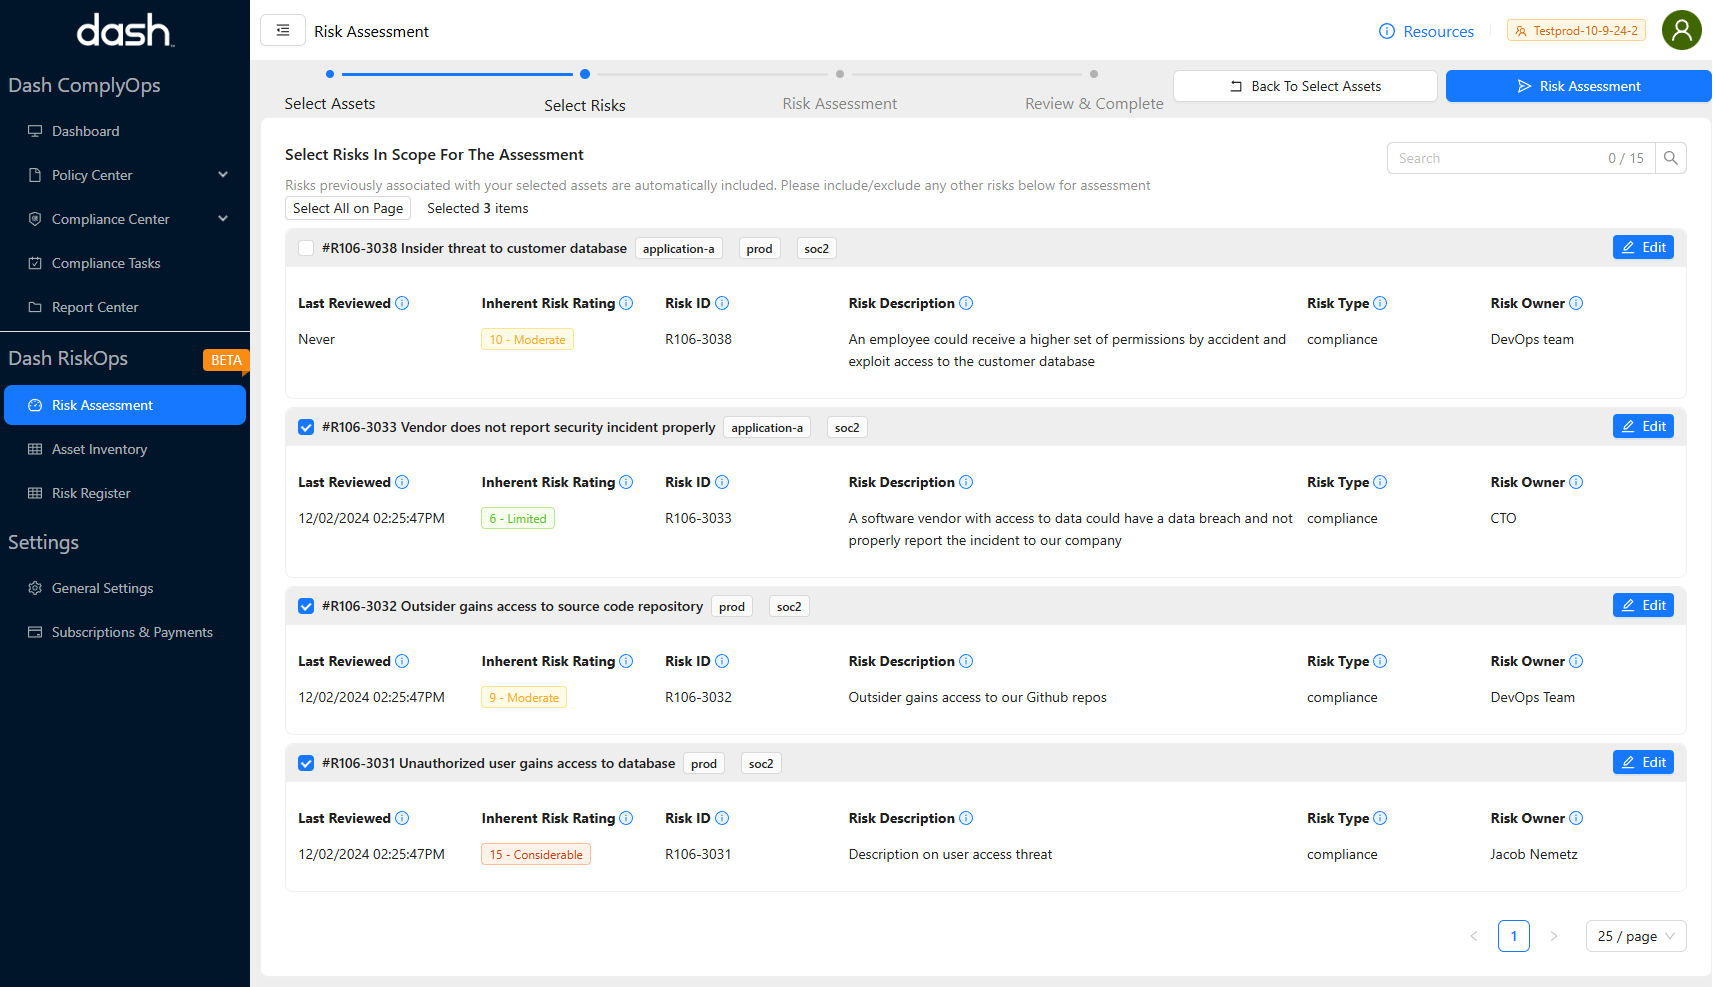
After completing Step 1 and selecting assets, you will be taken to a page to select Risks in scope for the assessment.
Note - You must have one or more Active Risks in your Asset Inventory to conduct a risk assessment.

Select risks applicable to the current risk assessment
Note - RiskOps will automatically select all risks that are “associated” with assets you have selected in Step 1. You may “deselect” these risks if needed by unchecking them.
You can page through assets and/or use the search bar to find specific risks to include in an assessment.
You can select individual risks by using the checkmarks next to each risk on the left side.
You can select all risks for a specific page by clicking the “Select All on Page” button on the top left
Review all selected Risks selected and confirm that the data is accurate.
You may edit risks as need on this page of the assessment by clicking the “Edit” button next to the Risk.
Once the applicable assets have been selected click the “Risk Assessment” button in the top right to move to the next step.
You must have at least one risk selected to move to the next page.
Step 3 - Risk Assessment
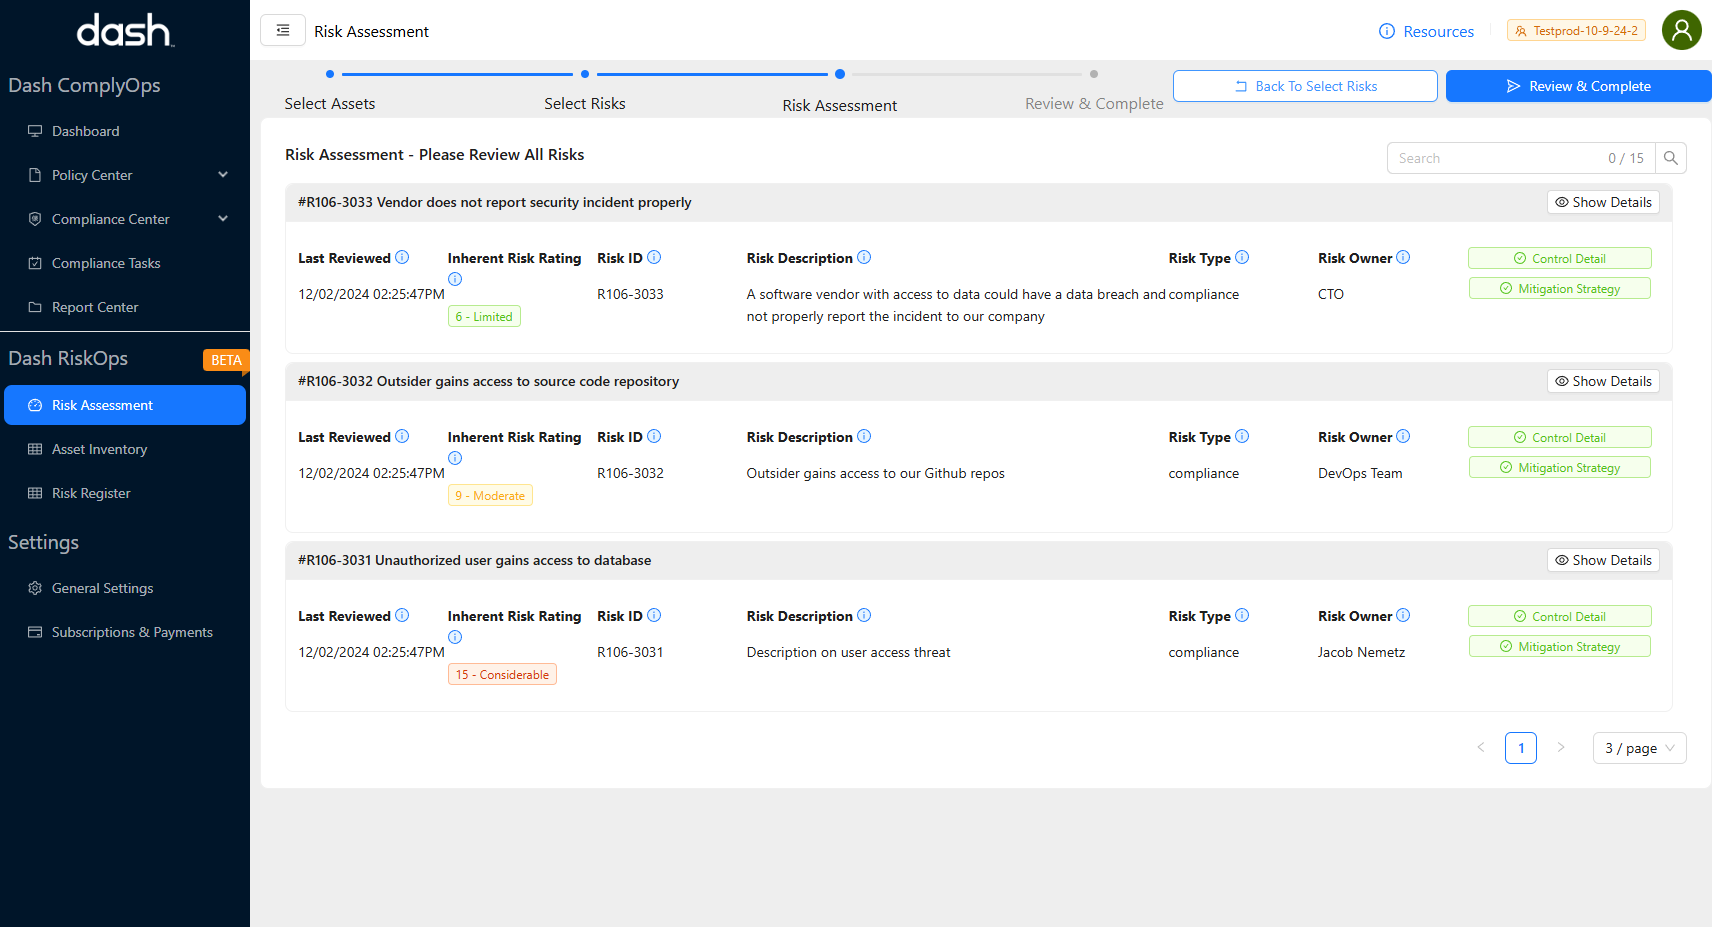
After completing Step 2 and selecting assets, you will be taken to the Risk Assessment portion of this assessment process.
In this page you will be shown all Risks in scope for this assessment as well as related Control Detail and Risk Mitigation Strategies for each risk.

Review the Risks displayed in this page. You may see all details for a risk by clicking the “Show Details” next to the Risk.
If a Control Detail is missing for any listed risks, please add it to the associated risk by clicking the “Add Control Detail” button.
If a Risk Mitigation is missing for any listed risks, please add it to the associated risk by clicking the “Add Risk Mitigation” button.
Once you have reviewed all risks and confirmed that the data is accurate, click the “Review & Complete” button in the top right corner.
Note - You must have a Control Detail and a Risk Mitigation attached to ALL risks listed in this risk assessment, to move to the next step.
Step 4 - Review & Complete
After completing Step 3 and going through the risk assessment, you will be shown a preview of your risk assessment report and general metrics.
You can see a preview of your risk report on the page.
You will see the number of risks classified as Low, Limited, Moderate, Considerable, and High.
You will be shown Inherent Risk, Control Adjusted Risk, Residual Enterprise Risk scores (from 0 to 25).
Further details on these metrics will be included in the final assessment report.
When you are ready you can click the “Complete Assessment” button in the top right of the page.
Note - After you complete an assessment, you will not be able to go back and edit any of the previous steps/
Enter in the name of the person completing the report and any final notes (this will appear in the PDF report)
Click the “Complete Assessment” button, to finish the assessment process.
Assessment Results
After you have completed the full Risk Assessment process (Including Steps 1-4) you will be see the latest Risk Assessment results.
You can view the Risk Assessment PDF Report by clicking the “View Risk Assessment” button next to the latest risk assessment.
You can download the Risk Assessment Details Excel (XLSX) file which includes a listing of all Assets and Risks included in the scope for the risk assessment.
Your team can utilize this report to see risk scores, calculated financial risk, and assets/risks by category. These insights can help your team to see the most prominent risks with the organization and determine next steps for remediation.
As you make improvements, or modifications to assets, risks, and controls within the organization, you may perform this risk assessment process periodically, to see how the risk profile for the organization has changes.