
Risk Register
What is a Risk Register?
The Risk Register in RiskOps equips organizations with a robust, real-time system to document, evaluate, and address risks across their IT environments and business operations. It eliminates the need for outdated tools like spreadsheets, offering a more dynamic and efficient way to track and mitigate risks as they evolve.
Having a well-maintained Risk Register is a cornerstone of any effective risk management strategy. This tool is designed to help organizations proactively manage potential threats, aligning with RiskOps' mission to enhance digital risk management processes. Teams can use the Risk Register to manage risk and gain greater visibilities into risks across the organization.
Getting Started With The Risk Register
The RiskOps Risk Register can be used to easily track emerging risks in real-time, determine threat levels, and resolve risks within your organization. Learn how to get started with your Risk Register below.
Creating Risks
Teams can create individual risks in the RiskOps Risk Register
Login to Dash RiskOps
Navigate to Dash RiskOps > “Risk Register” in the left sidebar

Click the “Add New Risk” button in the top right.
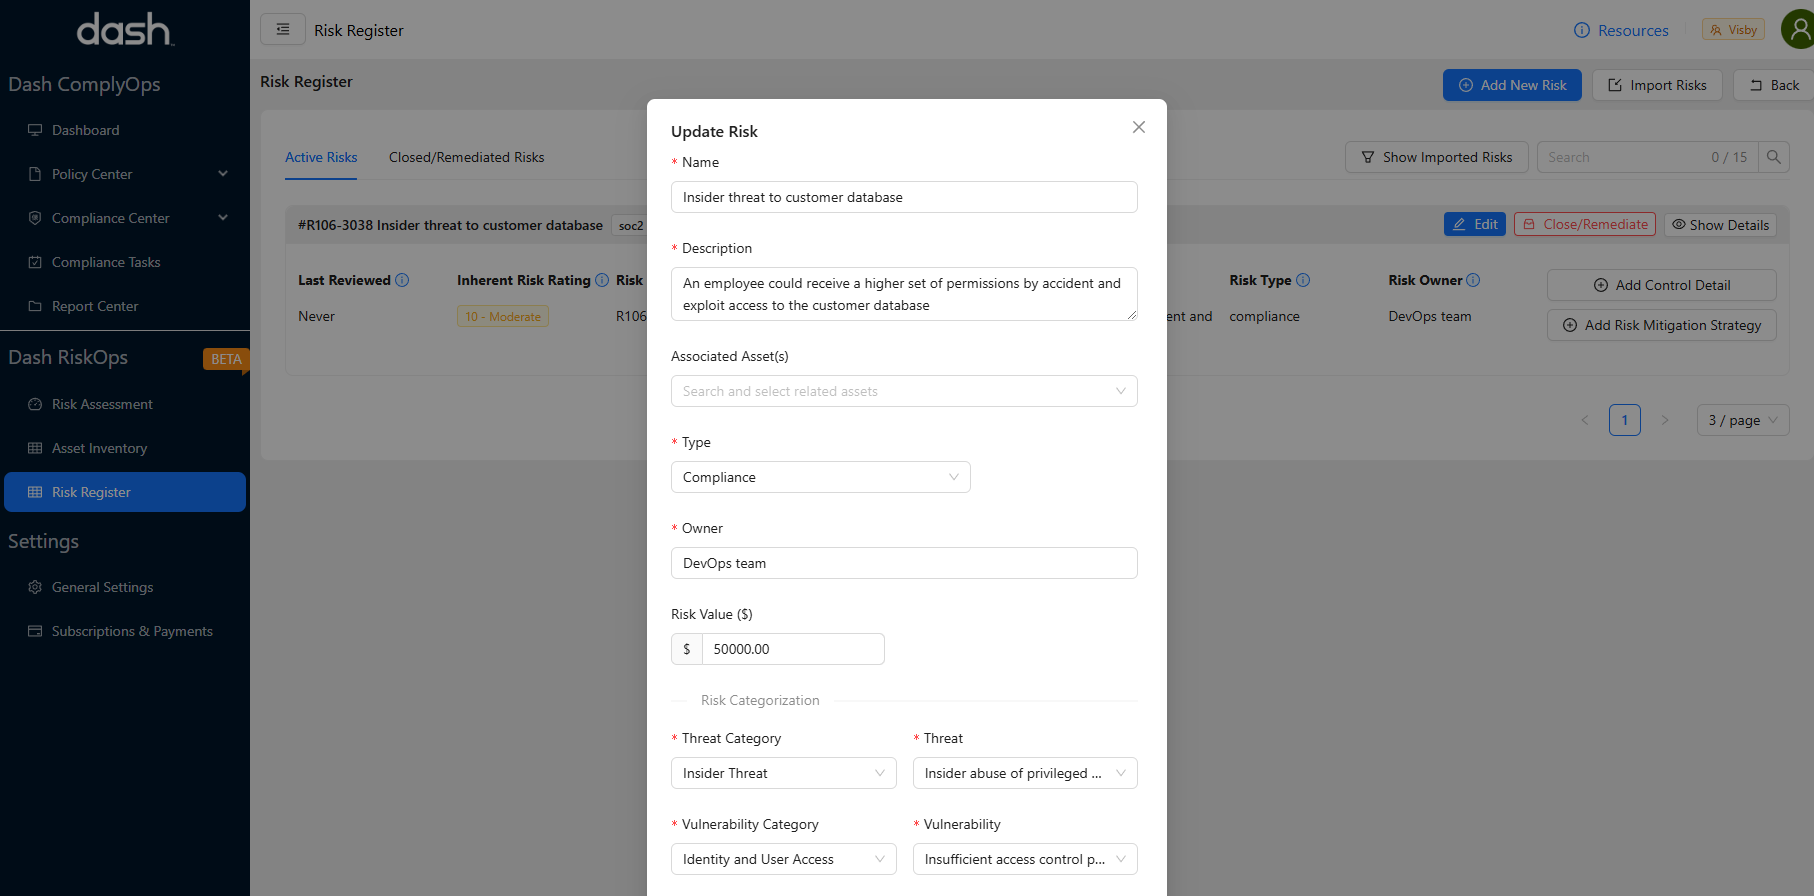
Enter all relevant information related to the Risk. The following fields are defined for each risks:
Risk Name* - The name for an risk identified in the organization.
Risk Description* - The description of an risk, including the purpose and use of the asset.
Associated Asset(s) - (Optional) The asset or assets the specific risk is associated with.
Risk Type* - The type of risk related to the organization.
Risk Owner* - The individual or team responsible for managing the risk.
Risk Value ($) - (Optional) The overall financial value of a risk (in dollars). (The amount of financial risk/damage a risk could pose to the organization)
Threat Category* - The overall threat category for the identified risk.
Threat* - The potential event or action that could be used to exploit a vulnerability within the organization.
Vulnerability Category* - The overall vulnerability category for the identified risk.
Vulnerability* - The weakness in a system, internal controls, or implementation that could be exploited by a threat source.
Likelihood* - The user-defined probability of a risk scenario occurring.
Impact* - The user-defined impact a vulnerability would have on the organization.
Compliance Framework - (Optional) User defined tags for related compliance frameworks or security programs. (If an risk is related to a specific security or compliance program you may consider adding tags such as “SOC2”, “HIPAA”, “AC-1”)
Environment - (Optional) User defined tags related to the risk’s environment/product (You may consider tagging risks with environment labels such as “prod”, “production”, “product1”)
Other - (Optional) Any other user defined tags.
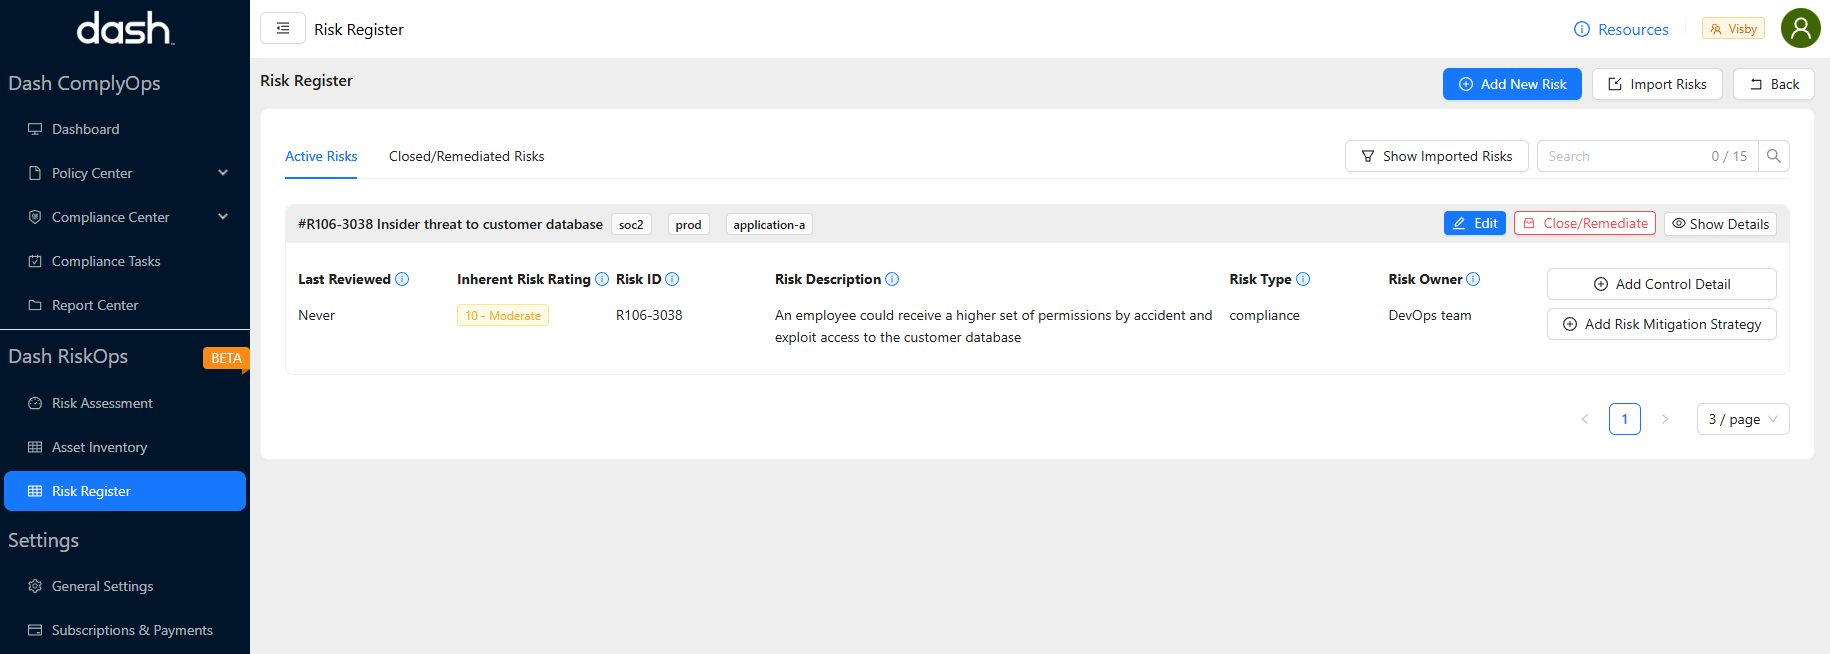
After entering all relevant information, click the “Save” button to create the Risk. The asset will then appear in the “Active Risks” area.
Adding A Control Detail To A Risk
After you have created a risk, you may attached a related control detail. A control detail describes how an organization has applied an adequate (or unsatisfactory) control to a risk.
Note - While a control detail is not required for risk creation in the Risk Register, a control detail must be attached to all risks in scope of a RiskOps Risk Assessment.
To add a Control Detail to an existing risk follow these steps:
Navigate to the “Risk Register” of the left sidebar
Search for applicable risk in your Risk Register and click the “Add Control Detail” button.
To edit this control detail later click the “Show Details” button and then click the “Edit” button next to Control Detail.
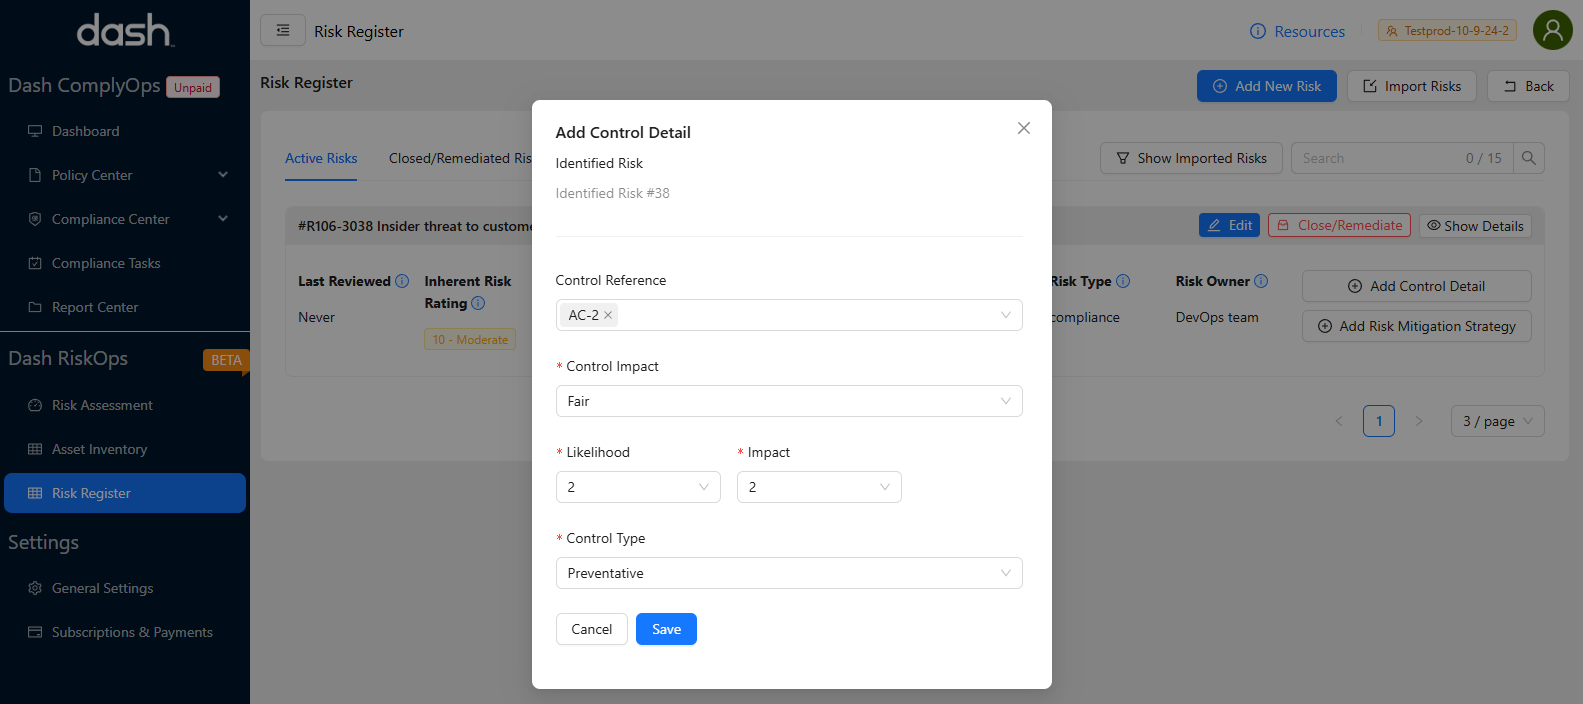
Enter all relevant information related to the Control Detail. The following fields are defined:
Control Reference - (Optional) Tags for the related security/compliance program of this control (IE. If you applied a ISO 27001 controls with a specific ID such as “ac-1”)
Control Impact* - This is a self-assessment of how effective the applied risk control is.
Likelihood* - (1-5 rating) for the likelihood of the risk occurring, now that the control has been applied. (1 = lowest likelihood of the risk being exploited, 5 = highest likelihood of the risk being exploited)
Impact* - (1-5 rating) for the overall impact the organization if the risk is exploited, now that the control has been applied. (1 = lowest impact to the organization, 5 = highest impact to the organization)
Control Type* - The type of control that has been implemented.
Adding A Risk Mitigation To A Risk
After you have created a risk, you may attached a related risk mitigation strategy (risk mitigation). A risk mitigation describes how an organization has chosen to accept, mitigate, or avoid a risk.
Note - While a risk mitigation strategy is not required for risk creation in the Risk Register, a risk mitigation must be attached to all risks in scope of a RiskOps Risk Assessment.
To add a Risk Mitigation to an existing risk follow these steps:
Navigate to the “Risk Register” of the left sidebar
Search for applicable risk in your Risk Register and click the “Add Risk Mitigation Strategy” button.
To edit this control detail later click the “Show Details” button and then click the “Edit” button next to Risk Mitigation.
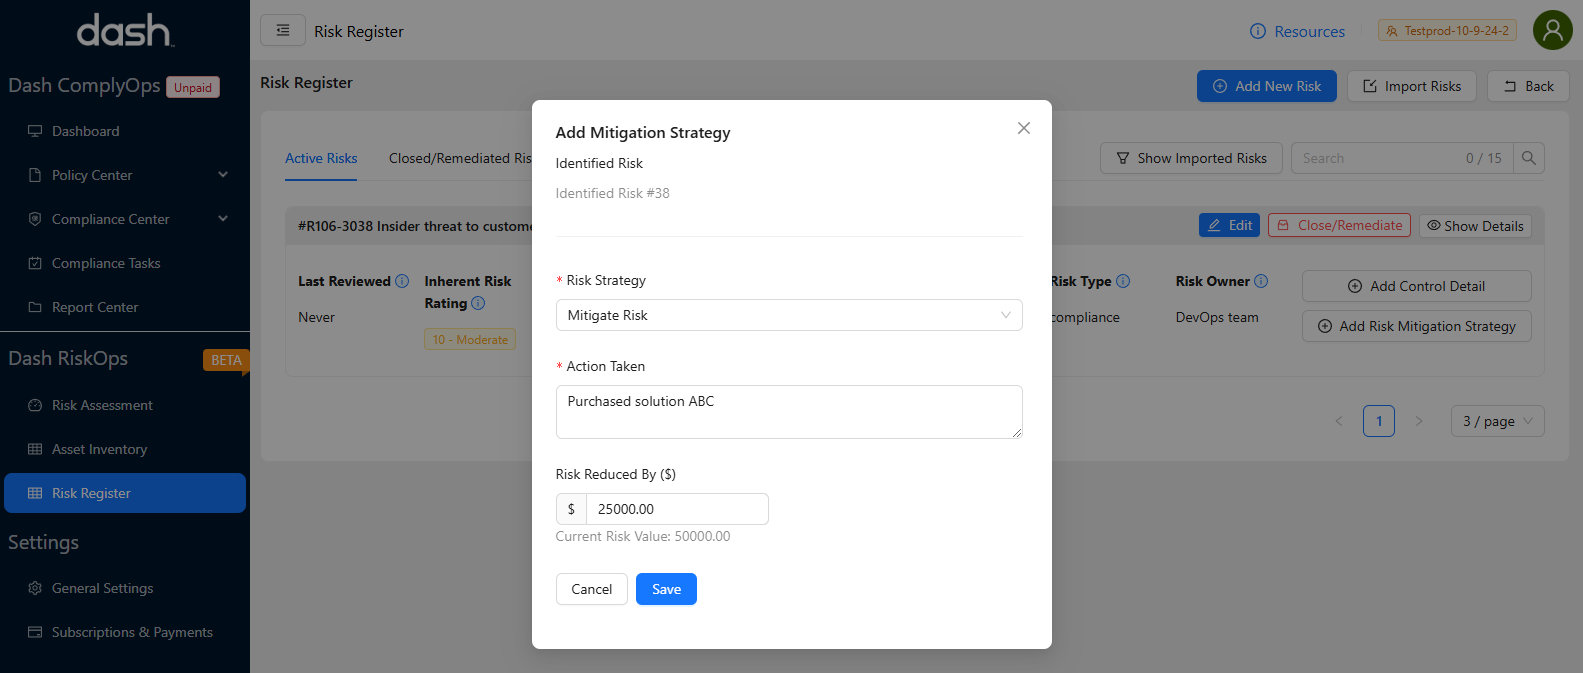
Enter all relevant information related to the Risk Mitigation. The following fields are defined:
Risk Strategy* - Your selected strategy for mitigating the current risk.
Action Taken* - A description on how your organization has applied this risk mitigation (IE. describing solutions implemented, procedures created, insurance or vendor purchases)
Risk Reduced By ($) - (Optional) Estimated value of risk (in dollars) that has been reduced by implementing this risk mitigation.
Importing Risks
RiskOps also provides teams with the option to import a XLS list of assets to the Risk Register. You can follow the steps below to import a list of Risks into the Risk Register:
Navigate to “Risk Register” in the left sidebar.
Click the “Import Risks” button
Click the “Import CSV File” button
You will be presented with steps for preparing a file and uploading a CSV of Risks.
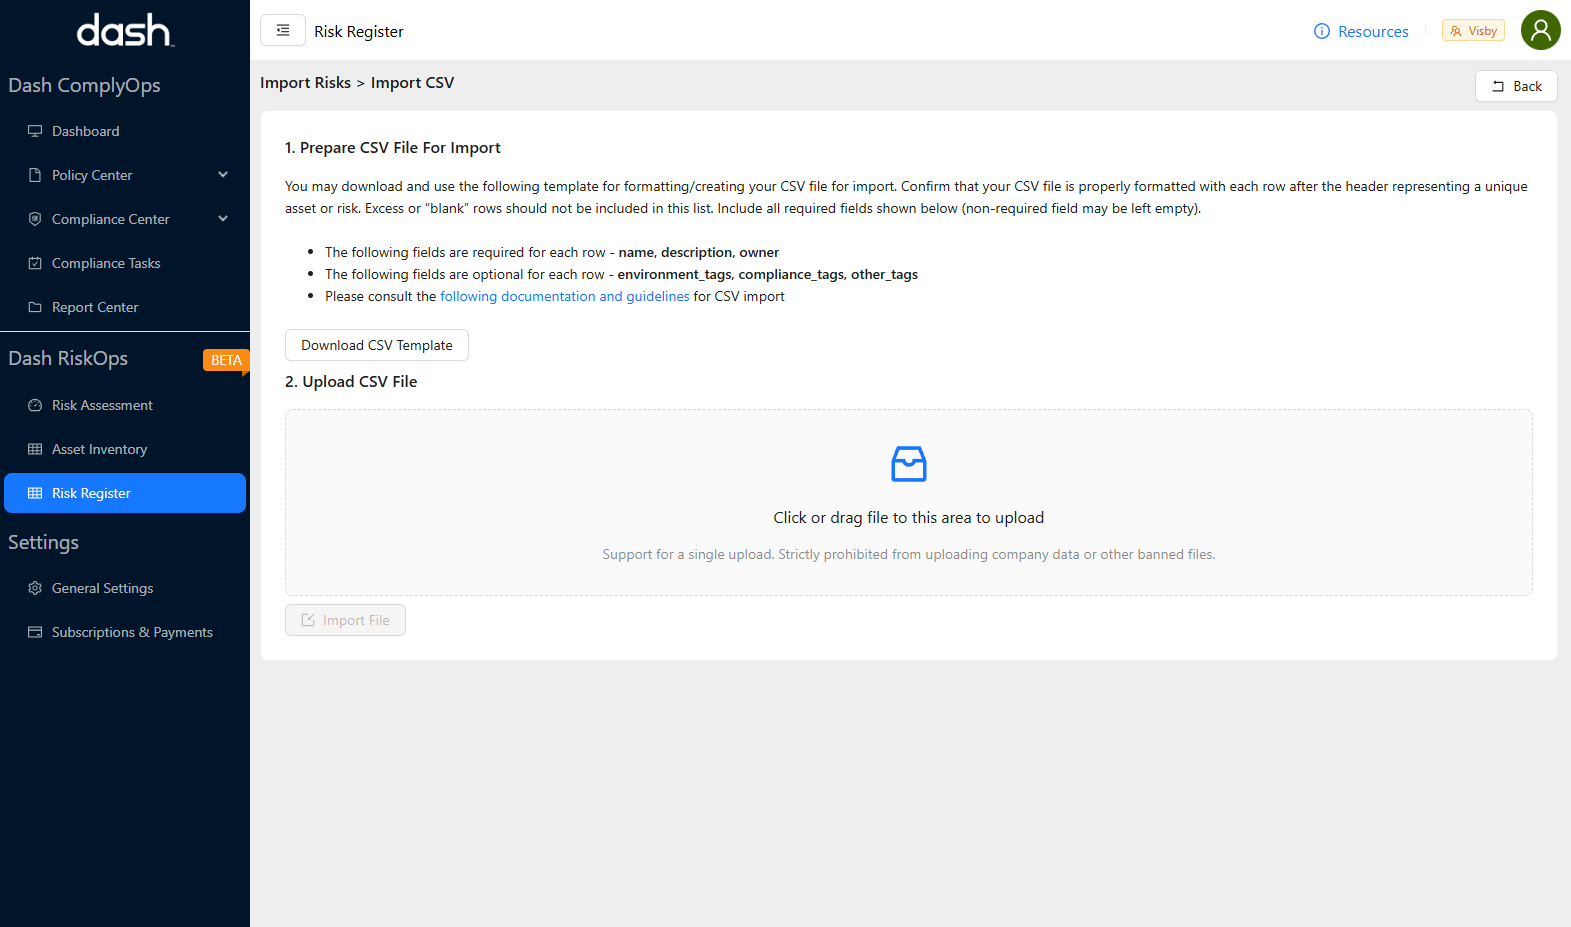
The following options are presented for the CSV import.
Download CSV Template -
Downloads a CSV file showing the format of fields needed for import.
Upload CSV File - You can click the upload field or drag a CSV file into the file upload area.
The following fields are required for each row - name, description, owner
The following fields are optional for each row - environment_tags, compliance_tags, other_tags
After uploading a CSV file with the appropriate format > Click the “Import File” button
Assets listed in the CSV file will be imported into the Risk Register.
Note - You will need to edit imported assets assets to add a relevant “Threat Category” and “Threat”, “Vulnerability Category” and “Vulnerability” categorization for each asset.
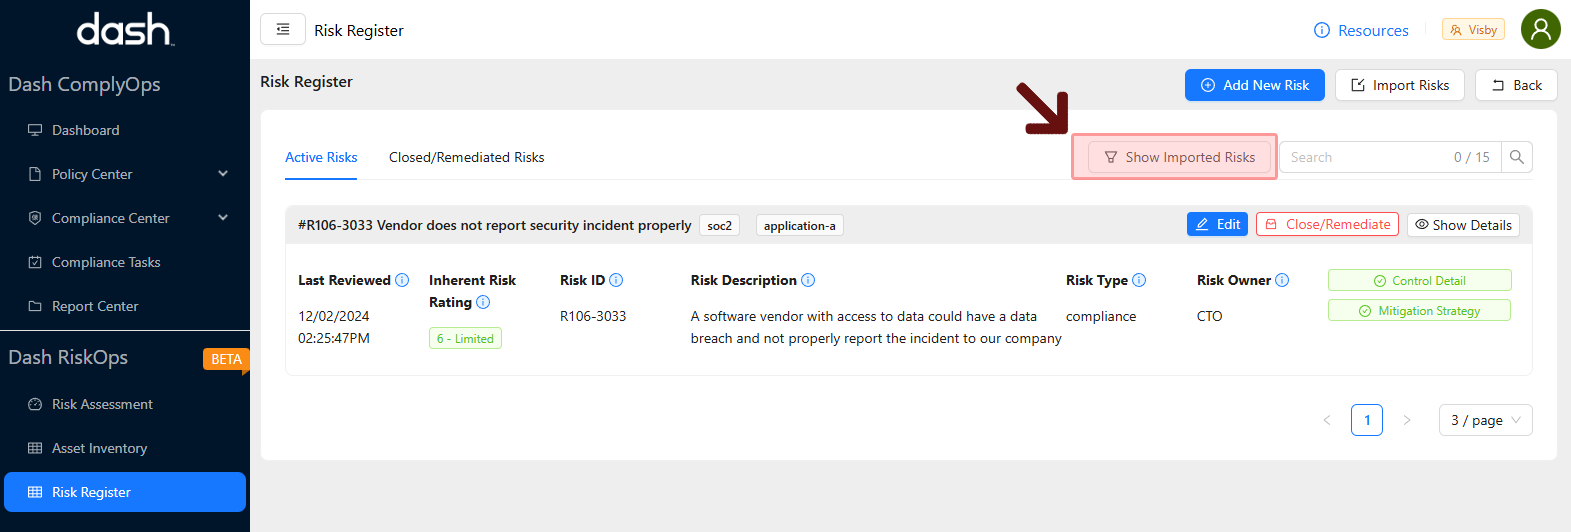
Click the “Show Imported Risks” button to see a list of all imported Risks.
You can then edit and add any missing fields.
Editing Risks
You can edit/update any individual Risk in the RiskOps Asset Inventory by following these steps:
Navigate to “Risk Register” in the left sidebar.
Search for the applicable Risk in related pages or search bar.
Click the “Edit” button for the Risk.
All Asset fields described in the “Create Risk” section can be edited.
After making changes, click the “Save” button to save any changes.
Risk Status
Active Risks
Any Risk created in the RiskOps Asset Inventory is created as an “Active” Risk by default.
Active risks are shown in the Risk Register by clicking the “Active Risks” tab
Active risks can be selected/included in the scope of evaluation a RiskOps Risk Assessment (Closed/remediated risks cannot be included in assessment)
Active risks can be edited/updated anytime
Closed/Remediated Risks
You can close or remediate a risk from your Risk Register at any point, by clicking the “Close/Remediate” button next to a Risk.
If an risk is no longer applicable or has been resolved, you may consider this action.
Closed/remediated risks are shown in the Risk Register by clicking the “Closed/Remediated Risks” tab.
You may “Re-open” or make a risk “Active” again by clicking the “Re-open” button for any risk located in the “Closed/Remediated Risks” tab.
Closed/Remediated risks cannot be selected/included in the scope of evaluation a RiskOps Risk Assessment.