
Connecting AWS Monitoring
The following instructions will guide your team in setting up and configuring one or more AWS accounts to Dash continuous compliance monitoring. Teams will have to provide IAM permissions via Dash and CloudFormation to allow Dash to scan secondary AWS accounts.
What Will You Need?
AWS User With Administrator Permissions – (the CloudFormation template creates resources that require a higher permission set)
Existing Dash ComplyOps Account
About 5 minutes of time
Connecting An AWS Account
To connect one or more AWS accounts, take the following steps:
Login to Dash ComplyOps at app.dashcomplyops.com
Navigate to Compliance Center → Scan Configurations
The page should look like this:
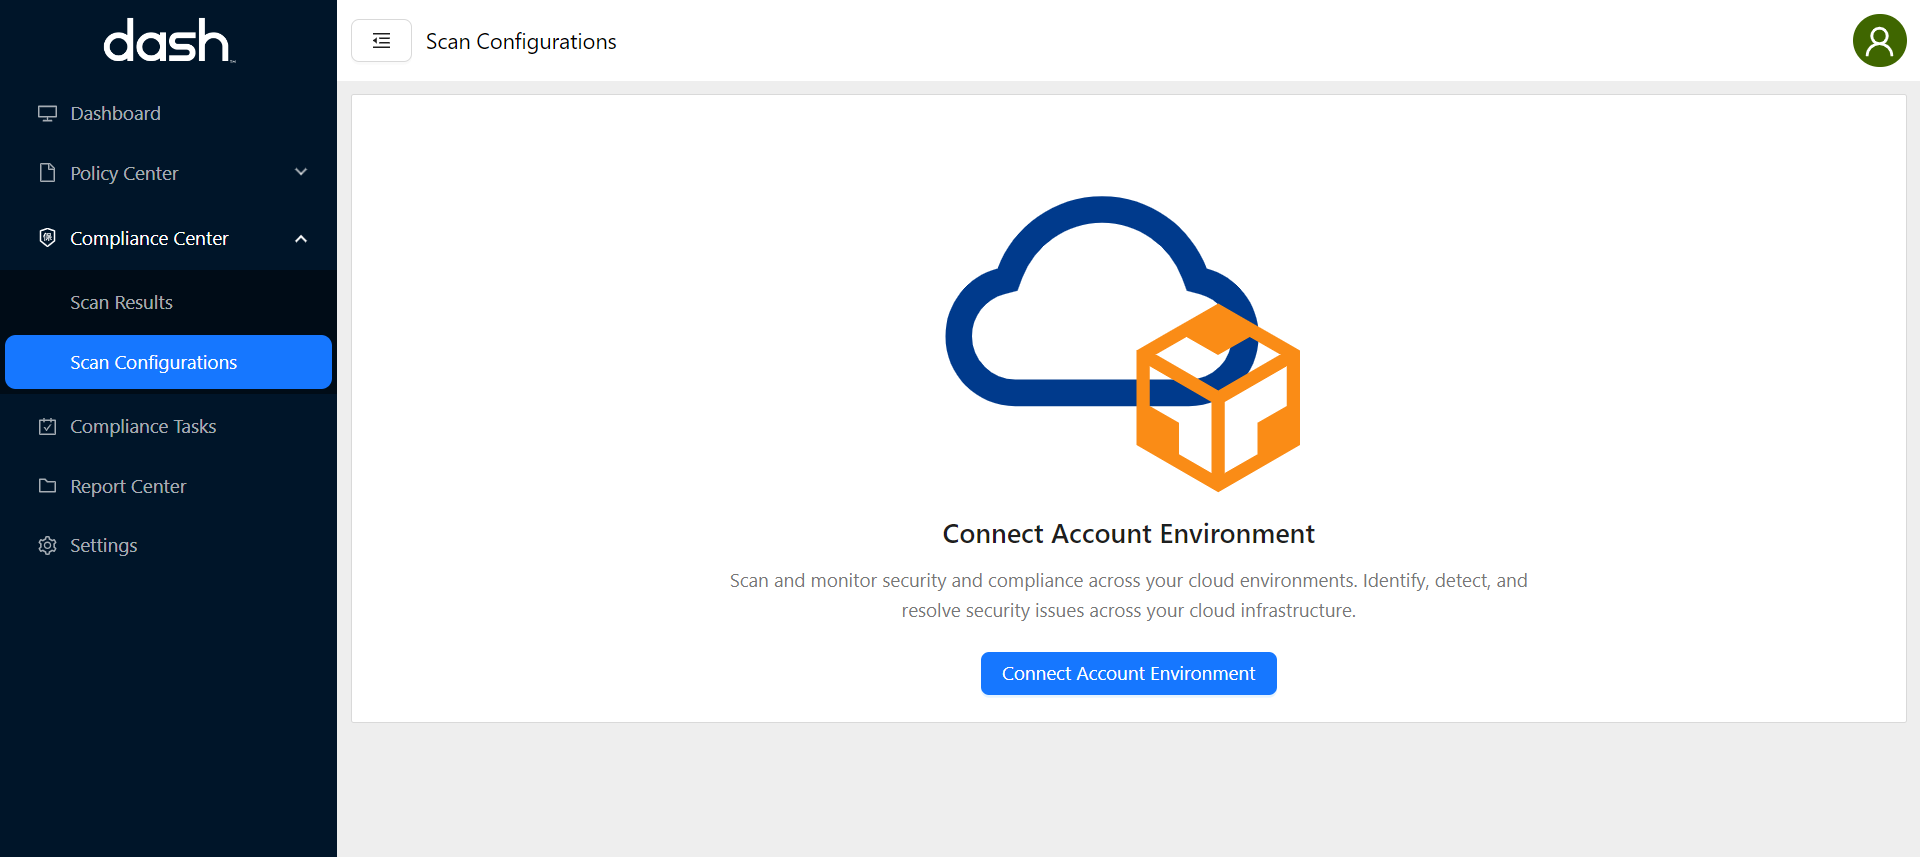
Click the “Connect Account Environment” button
You will be taken to the following page:
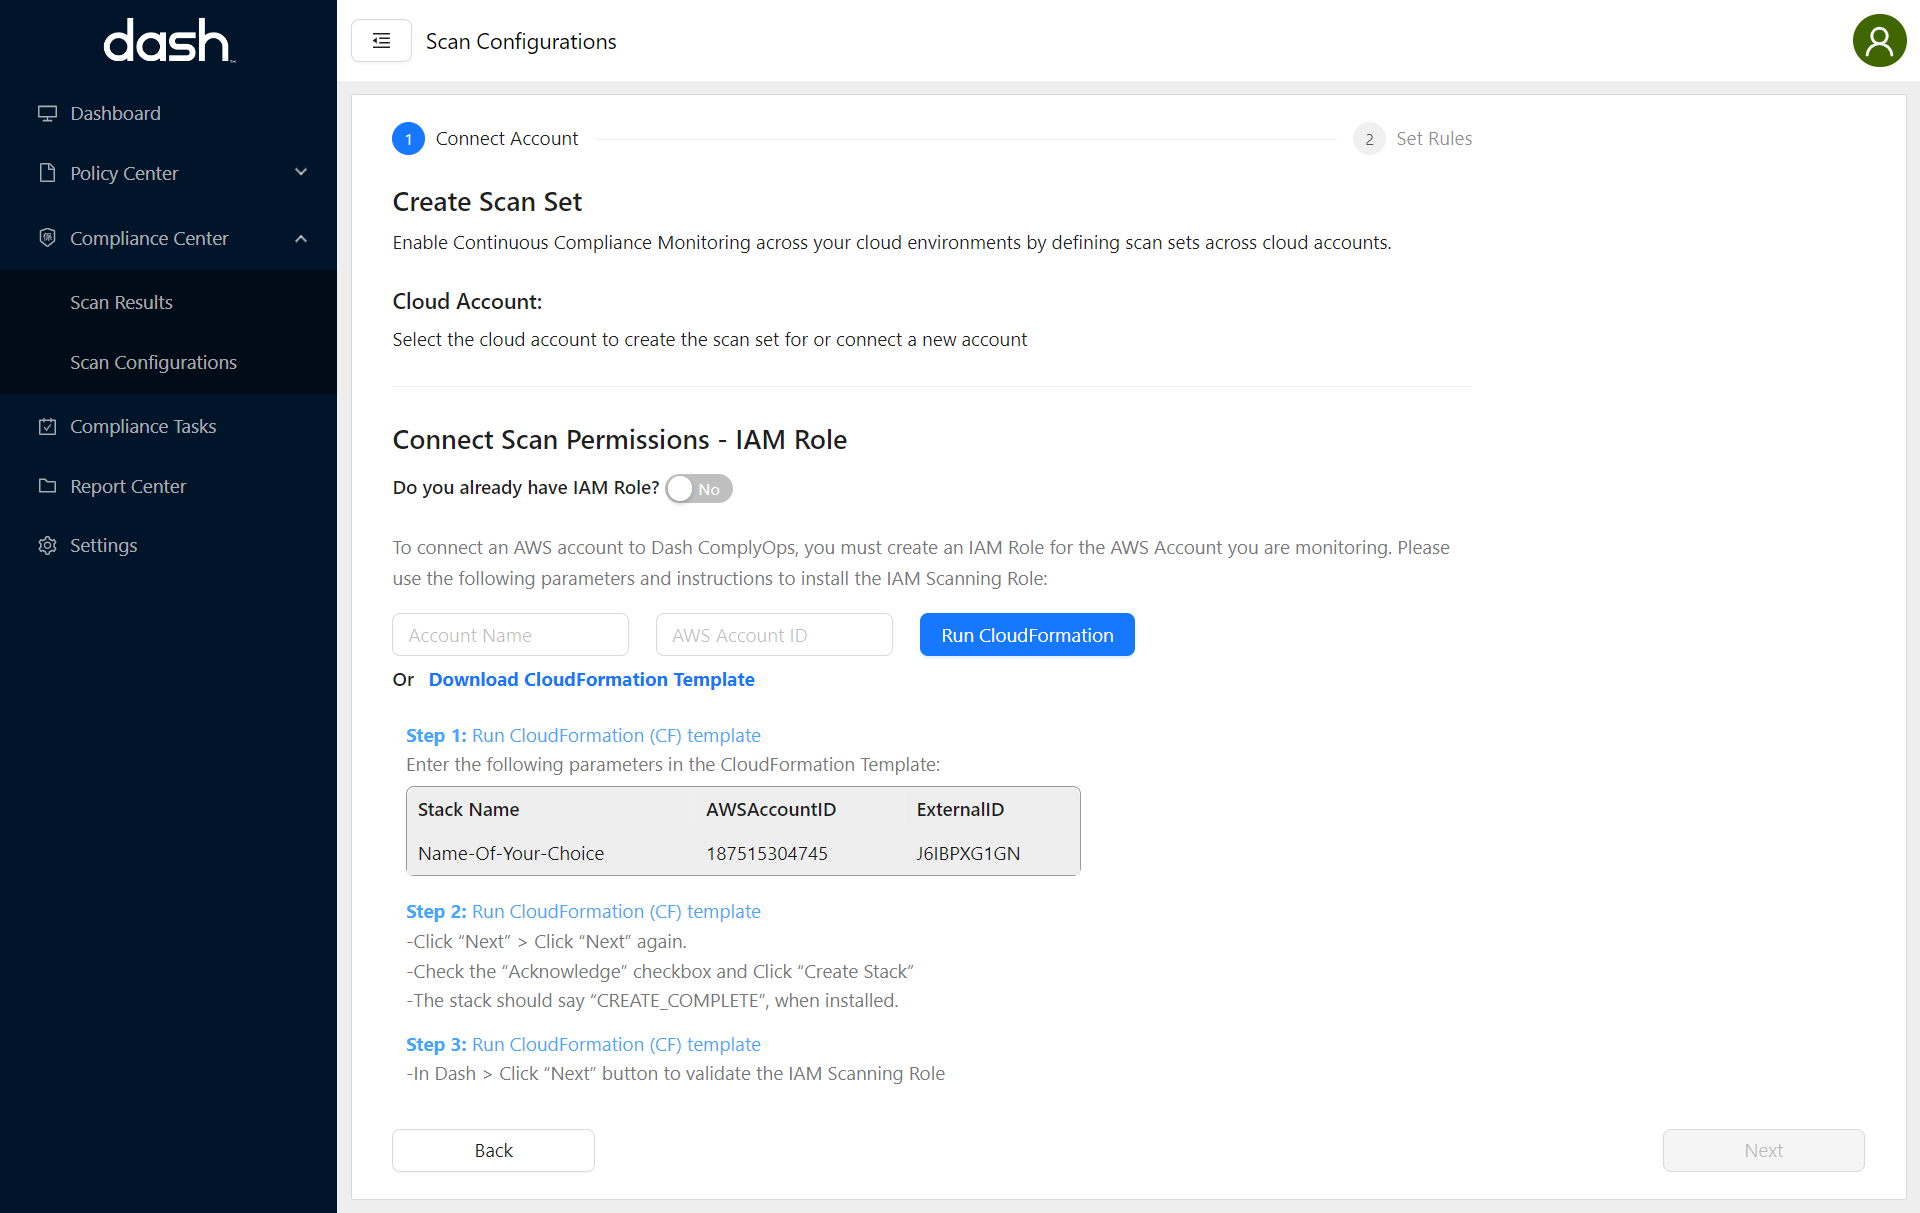
Enter the following information into the fields:
Account Name - A name defined by your team to identify the account you are connecting to monitoring (this can be a name of your choice)
AWS Account ID - Enter the 12-digit AWS Account ID for the AWS account you want to connect to Dash monitoring. You can find this by logging into your AWS account and clicking on the top right user dropdown.
Once you have entered the “Account Name” and “AWS Account ID” > Click “Run CloudFormation”
In a new tab, you will be taken to AWS where you will need to login and grant Dash permission to scan this environment:
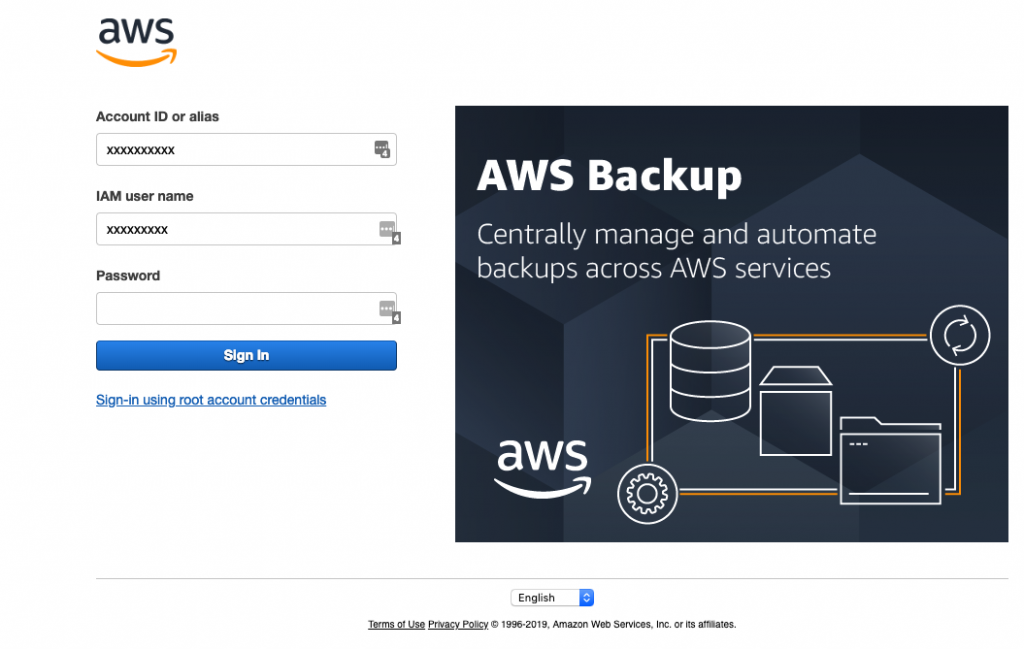
In the new browser tab that just opened, please login to the AWS account using your user and password for the selected account.
After logging it, you will be redirected to the CloudFormation setup page. It has already preloaded with the correct CloudFormation template and parameters.
These parameters should be pre-filled and there is nothing to change on this screen.
Stack Name = dashscanrole
AWSAccountID = 452806217681
ExternalID = The External ID from the Dash Modal
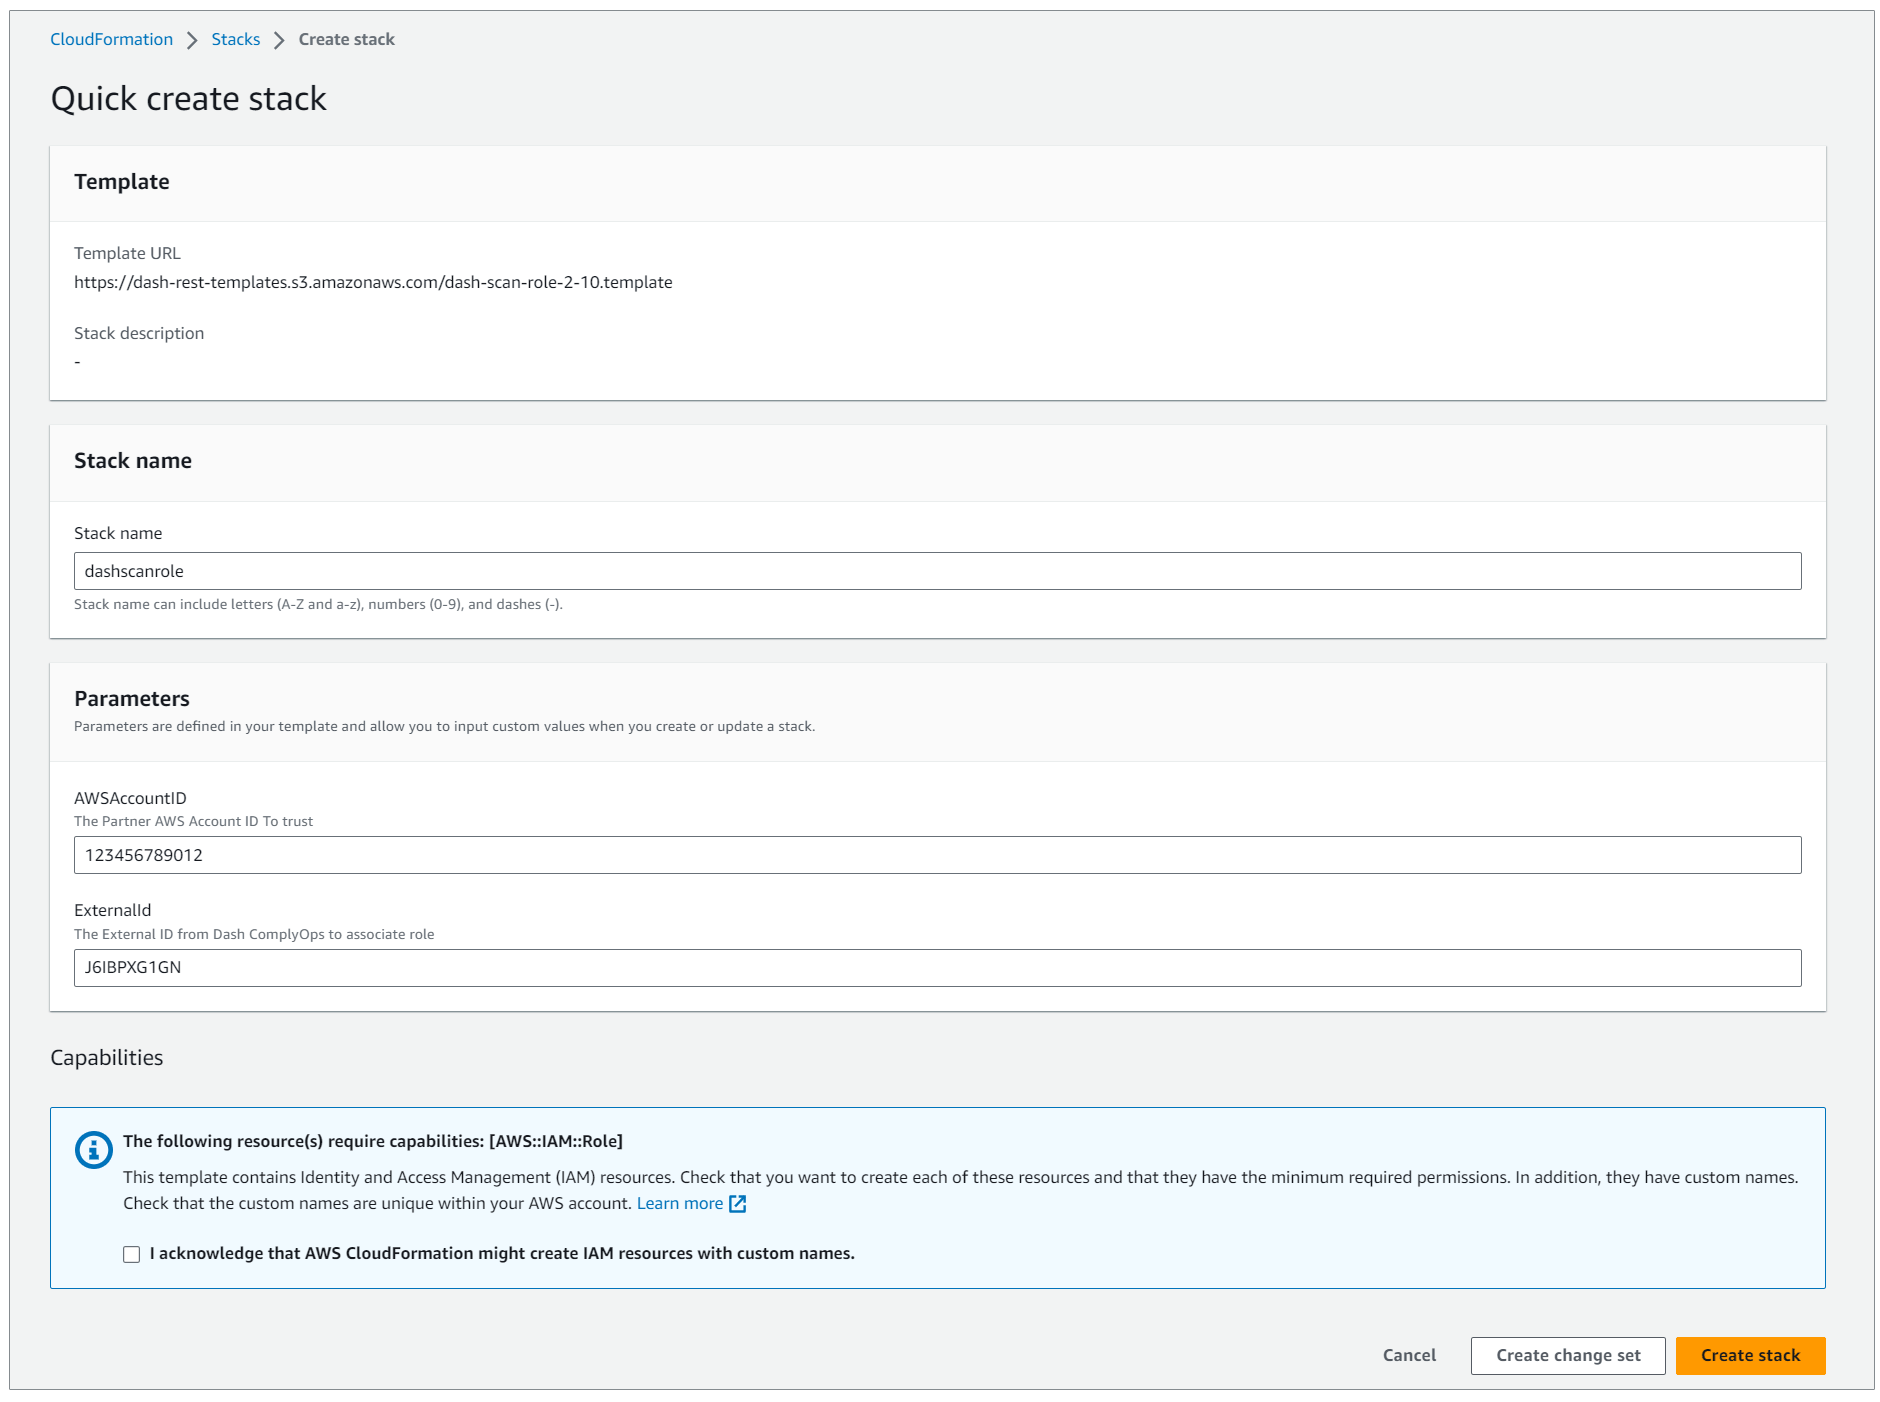
On this page, you must select the checkbox - “I acknowledge that AWS CloudFormation might create IAM resources with custom names“
Click the ‘Create Stack‘ button.
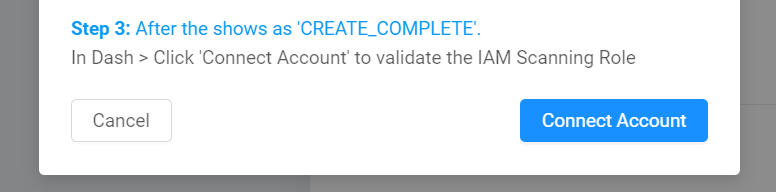
The CloudFormation template is now under way. It may take a few minutes until the CloudFormation template completes successfully. You will then see the status CREATE_COMPLETE.

Now you can navigate back to the Dash Settings Page. Click the “Connect Account” button.
The Dash application should recognize that you have connected the new AWS account to monitoring.
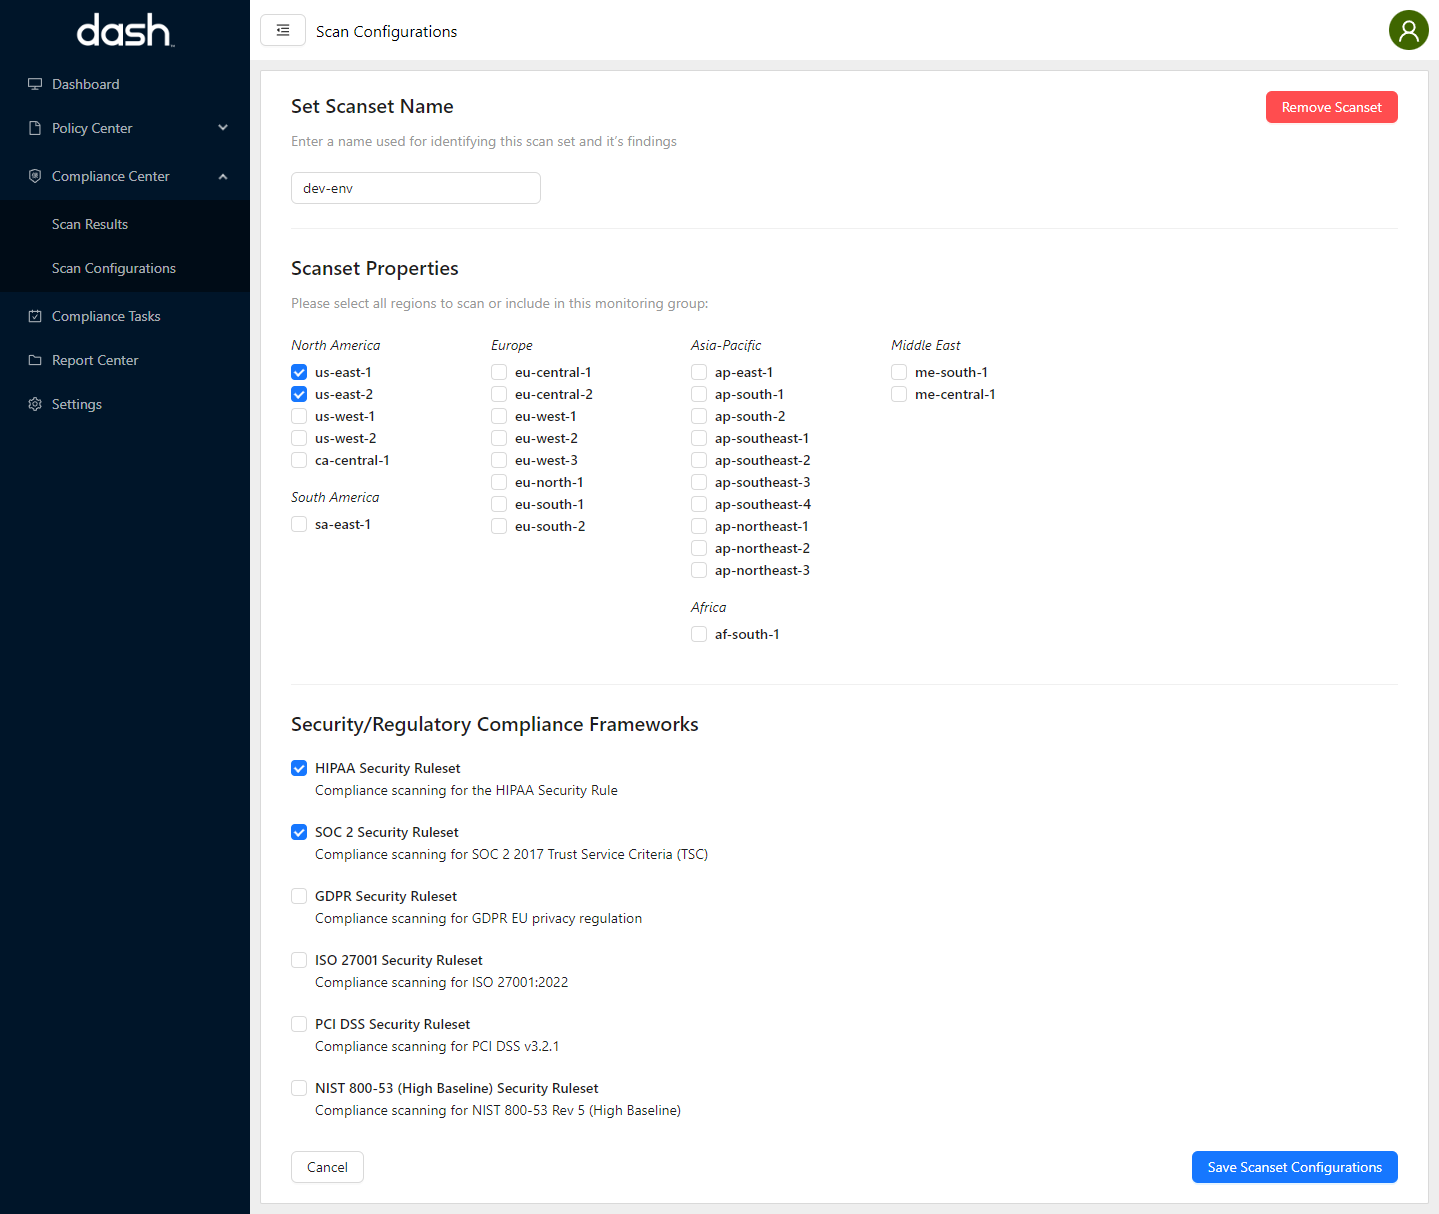
You will be taken to a page for creating your first Scanset
Scanset Name - Enter a name for this Scanset. This is how you will identify group of findings in Dash.
Scanset Properties - Select AWS regions to scan and monitor in this Scanset
Security Compliance Frameworks - Select security frameworks used for monitoring rulesets (HIPAA, SOC 2, etc)
Once you have input all options click the “Save Scanset Configurations” button.
Your first Scanset should now be connected.
You can run an initial scan by clicking “Yes” in the popup modal
You can edit this Scanset or create additional Scansets in the Compliance Center > “Scan Configurations” page mentioned in the documentation below

Creating A New Scanset
Login to Dash ComplyOps at app.dashcomplyops.com
Navigate to Compliance Center → Scan Configurations
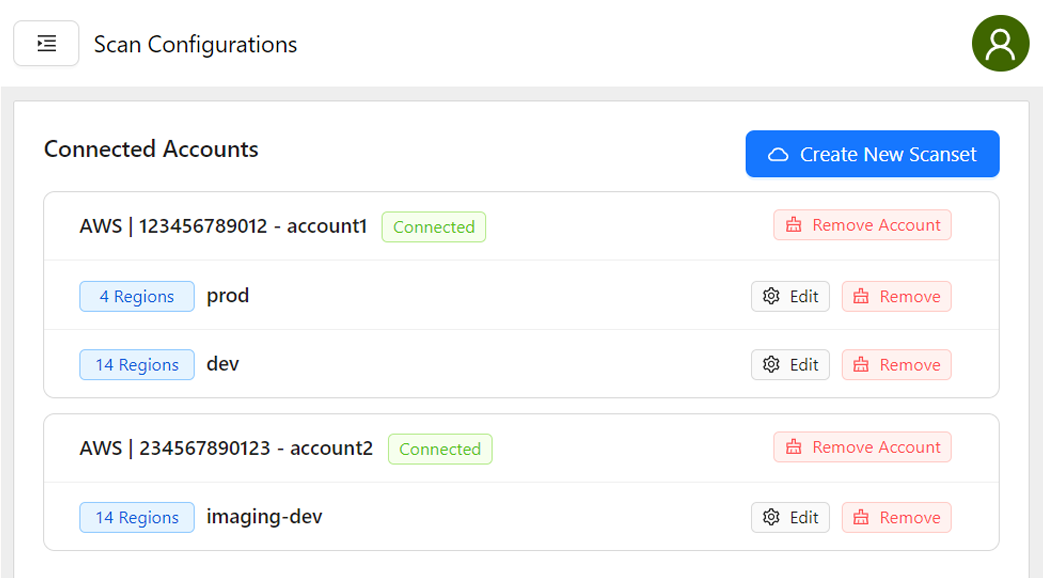
Since a cloud account and Scanset was created early, the page should look like this:
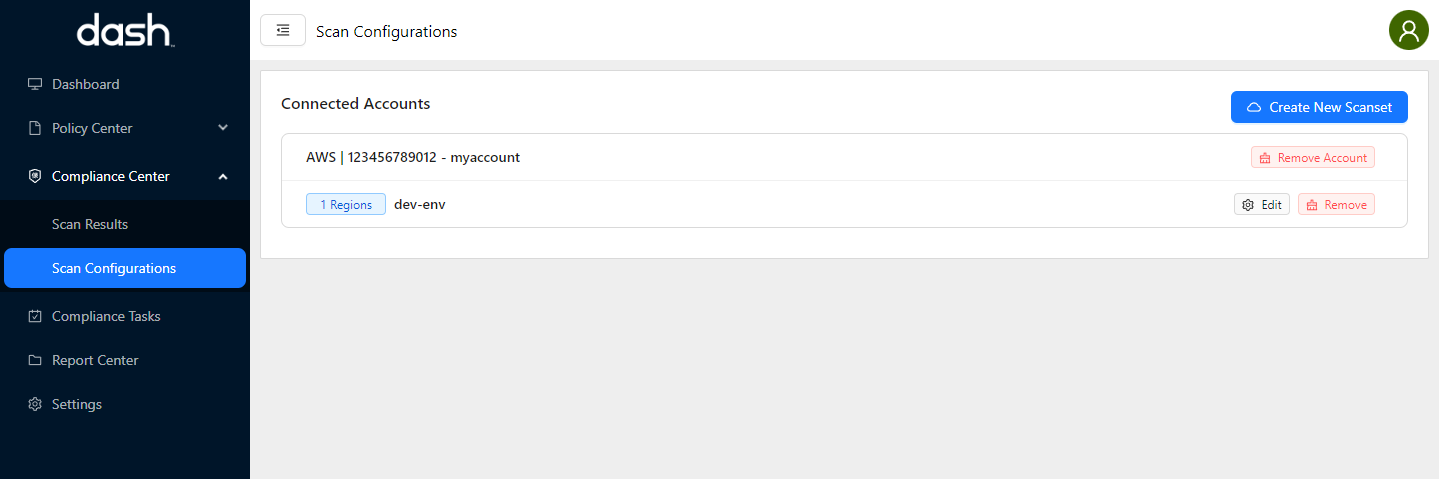
To create a new Scanset > click the “Create New Scanset” button
Note - If you want to modify regions/frameworks for an existing click edit on an existing Scanset
You will see the following page:
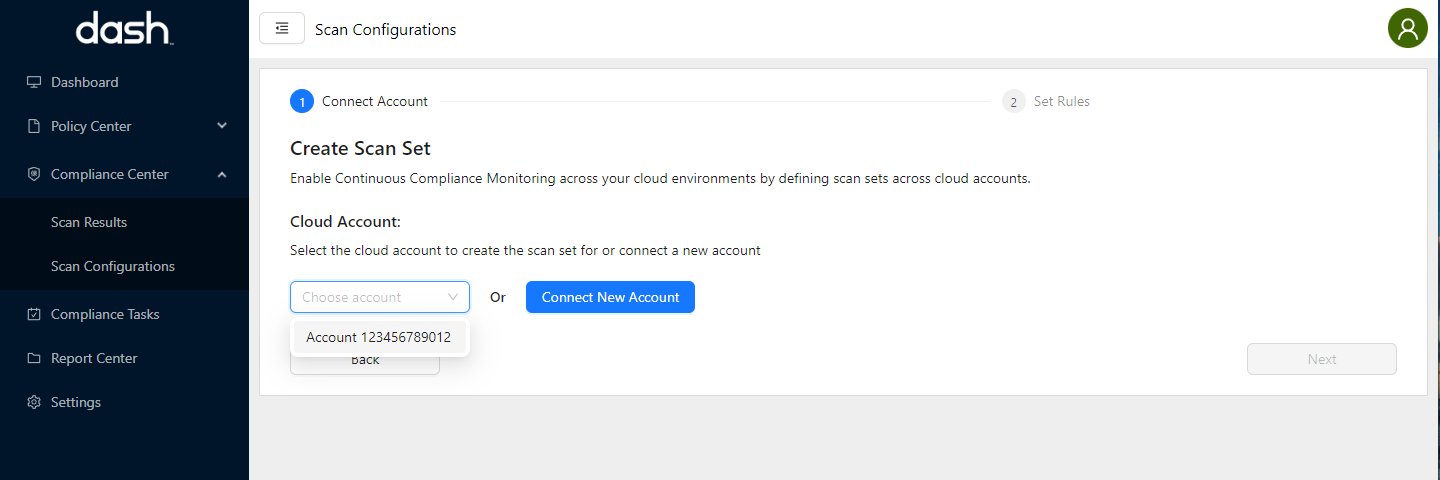
You will be prompted to select:
Choose an Existing Account - To create a new Scanset for different AWS regions/security frameworks
Connect New Account - To create a new Scanset for a different AWS account
Select the appropriate option options for the Scanset
Name - Used as a reference in Dash
Scanset Properties - Cloud regions to scan and monitor
Compliance Frameworks - Scan ruleset to run for the environment

Click the “Save Scanset Configurations” button
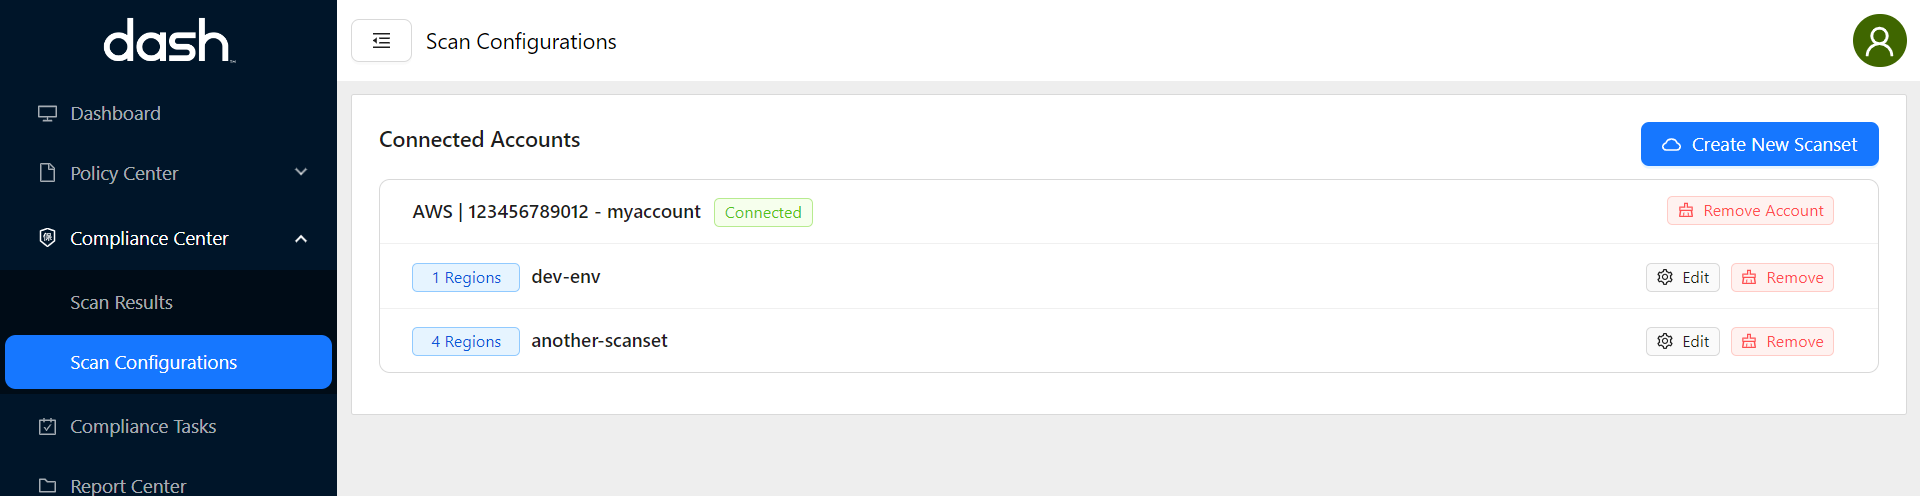
The new Scanset should now show up in the “Scan Configurations page list:
Editing Scansets
Login to Dash ComplyOps at app.dashcomplyops.com
Navigate to Compliance Center → Scan Configurations
Click the “Edit” button for the Scanset you want to edit > You will be taken to the Scanset settings page
You can make any changes to the name, regions, and security frameworks to scan for.
Click the “Save Scanset Configurations”
The Scanset is now updated, and further scans will be run with the new configuration.
Removing Scansets/Accounts
Removing a Scanset
Login to Dash ComplyOps at app.dashcomplyops.com
Navigate to Compliance Center → Scan Configurations
Click the “Remove” button next to Scanset you want to remove
Confirm that you want to remove the Scanset
Removing an Account
Login to Dash ComplyOps at app.dashcomplyops.com
Navigate to Compliance Center → Scan Configurations
Click the “Remove Account” button next to Account you want to remove
Confirm that you want to remove the Account
Note:
You will no longer be able to use any Scansets created under this account, unless it is reconnected.
You may want to remove the CloudFormation template for dashscanrole in the AWS account, to cleanup IAM role resources.
Manually Download/Install CloudFormation Template
If you are unable to use the “Run CloudFormation” function and/or the instructions above, you can download and deploy the template manually using the following steps to connect an AWS account to Dash ComplyOps monitoring:
Download the IAM Role CloudFormation Template - Download CloudFormation Template
Login to the AWS account you want to connect to AWS Monitoring
Navigate to AWS CloudFormation in the top search
Click “Create Stack” button
Upload the CloudFormation template downloaded from Step #1
In another tab navigate to Dash ComplyOps application
Login to Dash
Go to Compliance Center > Scan Configurations
Click “Create New Scanset” button
Click “Connect New Account” (if page is shown)
You should see variables needed for the CloudFormation stack in on this application page
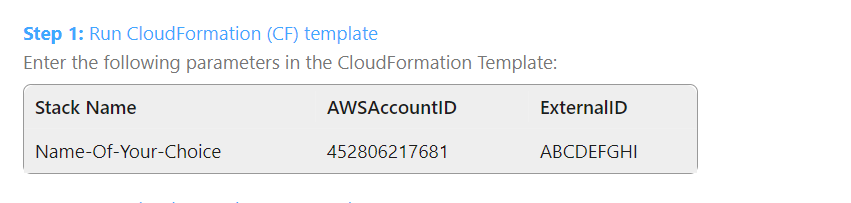
Enter/copy the following parameters into the CloudFormation stack parameters page:
Stack Name = dashscanrole (or name selected by you)
AWSAccountID = 452806217681
ExternalID = The External ID displayed in the Dash application
Click “Create Stack”
The CloudFormation template is now under way. It may take a few minutes until the CloudFormation template completes successfully. You will then see the status CREATE_COMPLETE.
Now you can navigate back to the Dash application Page > Enter the following information into the fields:
Account Name - A name defined by your team to identify the account you are connecting to monitoring (this can be a name of your choice)
AWS Account ID - Enter the 12-digit AWS Account ID for the AWS account you want to connect to Dash monitoring. (You can find this by logging into your AWS account and clicking on the top right user dropdown.)

Click the “Next Button” button.
The Dash application should recognize that you have connected the new AWS account to monitoring.
You will be taken to a page for creating your first Scanset
Scanset Name - Enter a name for this Scanset. This is how you will identify group of findings in Dash.
Scanset Properties - Select AWS regions to scan and monitor in this Scanset
Security Compliance Frameworks - Select security frameworks used for monitoring rulesets (HIPAA, SOC 2, etc)
Once you have input all options click the “Save Scanset Configurations” button.
Your first Scanset should now be connected.
You can run an initial scan by clicking “Yes” in the popup modal
You can edit this Scanset or create additional Scansets in the Compliance Center > “Scan Configurations” page mentioned in this documentation